If you have a golf cart, then you know how important the solenoid is. This component helps power the cart’s electric system. But what do you do if the solenoid goes out? We will teach you how to bypass the solenoid on your golf cart and get it up and running again!
What Is A Golf Cart Solenoid?

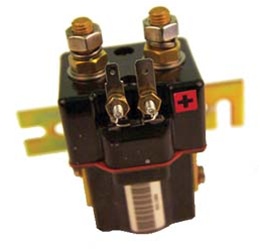
The golf cart solenoid helps to power the electric system in your golf cart.
It functions as the main “switch” that connects the current from your golf cart batteries to the motor.
The solenoid consists of two parts: the coil and a steel plunger.
When the coil is energized, it creates a magnetic field, which causes the plunger to close, allowing the current to flow from the battery to the golf cart’s controller or starter (depending on if you’ve got a gas or electric golf cart).
The power that’s sent to the controller or starter then powers the motor in your golf cart.
Simply put, your golf cart will not run without a working solenoid because no electrical power is getting transferred from the battery to your cart.
This is one of the hardest-working parts of your golf cart and is a major reason why many of them fail at least once during a golf cart’s lifespan.
What Are The Symptoms Of A Bad Solenoid On A Golf Cart?
If you are having trouble with your golf cart, one of the first things you should check is the solenoid.
There are a few symptoms that can indicate that your solenoid is going bad, which we’ll cover below.
Golf Cart Won’t Start
If you turn on the key to your golf cart and nothing happens, this could be a sign of a bad solenoid.
There are several other culprits that could be why your golf cart won’t start which you should also rule out.
Clicking Noise When Starting, But No Movement
Another symptom is if your golf cart starts making clicking noises but still won’t move.
The clicking sound you hear is the solenoid attempting to work, but the power is not being transferred to the golf cart.
It could be that the solenoid is worn out, has a bad connection, or is defective.
Dimming Or Flickering Lights
You might also notice that the lights on your golf cart are dimming or flickering.
This is another symptom of a failing solenoid.
If you notice any of these symptoms, then it may be time to replace your golf cart’s solenoid.
But before we bother with that, let’s figure out if we can rule out the solenoid as the source of the problem by bypassing it.
How To Test A Golf Cart Solenoid

If you’re having trouble with your golf cart and suspect the solenoid, then you’ll need to test it.
Before you can test it, you’ll first need to find the solenoid.
Most solenoids are located under the seat of many golf carts, but the exact location will vary based on the make and model of your cart.
Before we get to that, here’s what you’ll need:
- Multimeter or voltmeter (nothing fancy, just the basic version of either will do)
- Wrench or socket set
- Electrical tape
- Rubber gloves
Testing A Gas Golf Cart Solenoid
- First, disconnect the negative battery terminal.
- Next, locate the solenoid on your golf cart.
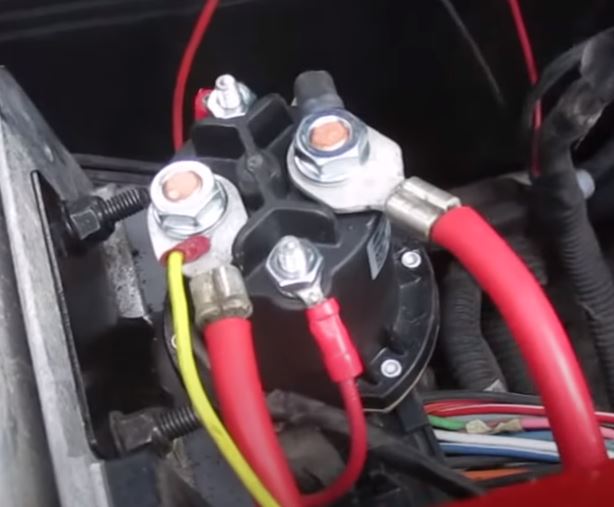
- Once you’ve found it, remove the wires from the solenoid terminals that run to the starter.
- Now, set your multimeter to Ohms mode and touch one lead to each of the solenoid’s large terminals.
- You should see a reading of 0 Ohms if the solenoid is working properly.
- If you don’t see a reading, or if the reading is infinite, then the solenoid is most likely bad and will need to be replaced.
- Next, turn the golf cart key to the ‘On’ position, put the cart in drive, and repeat the testing.
- As you slowly apply pressure to the gas pedal, listen for a clicking sound.
- If you hear the clicking noise, you should be seeing a reading of 0.4 Ohms or less on your measurement device.
- If you’re seeing a reading greater than 0.4 Ohms then the solenoid is bad and needs to be replaced.
Testing An Electric Golf Cart Solenoid
This method is similar to the first one, but you’ll need to set your tester to a DC voltage setting around the 200s.
- First, check the reading on the solenoid’s smaller terminals while turning the ignition on.
- If nothing happens, press down on the accelerator – if you see voltage spike, then you’ve got a faulty solenoid.
- If there is no activity when engaging the accelerator then that rules out the solenoid as the cause of your problem.
- If you didn’t find any problems with your golf cart solenoid, something else is probably causing the issue.
If you suspect the motor, check out our guide on how to test a golf cart motor where we outline the most common problems and how to test them.
Can You Bypass A Solenoid On A Golf Cart?
Yes, you can bypass your golf cart’s solenoid, but this should only be done as a final option after you’ve done the other troubleshooting and testing steps we’ve outlined above.
It can get you out of a bad situation in a pinch but you need to take proper precautions and also understand it may cause damage to your golf cart.
How To Bypass A Golf Cart Solenoid
Before we go through the process of showing you how to bypass a golf cart solenoid, we need to remind you of two things:
First, always take proper safety precautions and use safety gear.
Second, only do testing and repairs that you feel confident in.
There’s nothing wrong with bringing your golf cart to a local golf cart repair shop near you for work, and that’ll be cheaper in the long run versus getting yourself into a mess!
Now that those warnings are out of the way, here’s how you can bypass a golf cart solenoid:
- Start by ensuring your golf cart batteries are fully charged and working properly.
- Locate the two largest wires that connect directly to the solenoid.
- Detach these wires from the solenoid.
- Attach the wires directly.
- If your golf cart starts up and drives, you are confirmed to have a bad solenoid.
Now you can reattach everything as it was originally until you can replace the solenoid.
In a critical situation, you can drive the golf cart while bypassing the solenoid if necessary, but don’t do it for too long as it can damage your golf cart.

