
Learning how to test a golf cart motor is not as difficult as it may seem. In fact, with the right tools and instructions, it can be a relatively easy process.
In this article, we will provide step-by-step instructions on testing your golf cart motor.
We will also recommend the tools that you will need for the job.
So, if you are looking for how to test a golf cart motor, read on!
Before You Test Your Golf Cart Motor
The first thing you should do before testing your golf cart motor or taking anything apart is to make sure your power source for charging the cart is working.
This is the easiest step and most logical before getting into your golf cart!
Use a 120-Volt tester and insert the probes into the electrical socket (red in the smaller slot, black in the larger one), then press the test button.
If you get a reading back of between 110-120 volts, your power source or wall outlet is functioning properly and you can rule this out as the cause of the problem.
Golf Cart Motor Testing Precautions

Before you get started, it’s important to keep a few safety measures in place.
- First, make sure your golf cart is parked on a level surface and turn the key to the “off” position.
- Second, always use wheel chocks to keep your golf cart from rolling away from you (or over you!).
- Next, always disconnect the battery by removing the main positive and negative cables from the battery pack.
You don’t want to risk an electric shock.
What To Try Before Testing Your Golf Cart Motor
- The first thing to try before testing your motor is trying the “reset” button.
Most electric golf carts have a reset button on the exterior, but some may be located in or near the engine compartment.
Pressing a button is much easier than testing your golf cart motor, so it’s always worth a shot to try this.
- Next, test the voltage of each of your golf cart batteries using a multimeter (black on negative and red on positive) to see if you’re getting a good reading back.
If not, you may have an issue with your battery or golf cart charger instead of your motor.
How To Test A Golf Cart Motor
There are a few simple steps that you can take to test your golf cart motor. Below, we will outline these steps and provide the tools that you will need for the job.
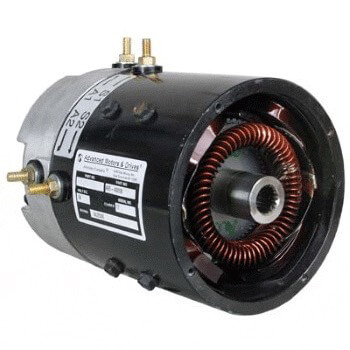
Step One: Inspect The Motor
The first step is to inspect the motor.
- Find the panel that covers your golf cart motor on the rear of the cart.
- It’s usually a rectangle or square shape and has screws holding it in place, so take the screws out and set them aside for later.
- Next, we suggest you take multiple pictures of everything in your golf cart’s motor compartment before taking anything apart so you can reference it later.
- This is an important step! Wiring diagrams are helpful, but photos will make your job easier when it’s time to reassemble everything.
- Make sure that there are no obvious damage or problems.
If not, proceed to the next step.
Step Two: How To Test Your Golf Cart Motor For A Short
You’ll need to check the terminals of your golf cart’s motor to ensure they’re operating as they should and sending electric signals throughout the cart’s components properly.
- First, set your multimeter to either the continuity check setting or the ohms setting.
- Next, your golf cart’s motor will have four poles, typically labeled A1, A2, and either S1 and S2, or F1 and F2 depending on the golf cart’s type.
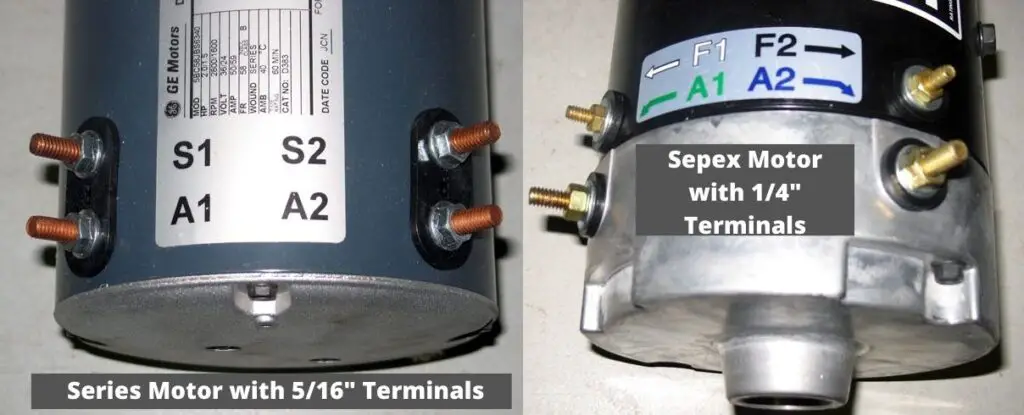
Test the following pole combinations and look for the following readouts on your multimeter:
Test S1 to S2 (or F1 to F2):
- Place your black probe on S1/F1 and your red probe on S2/F2.
- Look for a reading on 0.8-1.2 Ohms.
Test A1 to A2
- Place your black probe on A1 and your red probe on A2.
- Your meter should beep or read for continuity.
Test A1 or A2 to the motor body:
- Place your black probe on either A1 or A2, and the red probe on the metal portion of the motor body.
- Your meter should read zero continuity.
Test S1 or S2 to the motor body:
- Place your black probe on either S1 or S2 (aka F1 or F2 on Regen motors), and the red proble on the metal portion of the motor body.
- Your meter should read zero continuity.
Test A1 to S1/F1:
- Place your black proble on S1/F1 and your red probe on A1.
- Your meter should read zero continuity.
If all these tests read properly, you can continue on to the next testing step.
If any of the tests failed, you’ll need to look into replacing or repairing the terminal that’s causing the issue.
Note: These above tests will not show if the short is in the armature. That testing requires a special tool that only golf cart mechanics or automotive repair shops have.
Step Three: Test The Solenoid
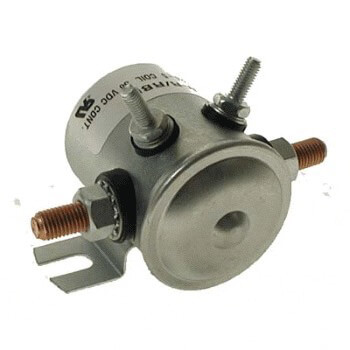
The solenoid in your golf cart’s motor distributes electricity to different parts in your golf cart, and they sometimes fail or wear out over time, so it’s important to test it.
Before you test the solenoid, you should first clean the terminals because it can sometimes solve the problem easily.
Scrub the terminals using an old toothbrush or wire brush with a 2:1 mixture of water and baking soda, then wipe the terminals clean and dry them.
See if that solves your problem, and if not, then it’s time to test the solenoid.
Testing Your Golf Cart Solenoid
- First, make sure your golf cart batteries have a full charge.
- Next, try to start up your golf cart, listening for a faint “clicking” noise. That’s the solenoid doing it’s job.
- If you can’t hear a click, the solenoid is probably the cause of the problem and you’ll need to replace it.
- If you heard a click but the cart didn’t start up, then you can rule out the solenoid as the cause of the issue and proceed to the next step.
Tools You’ll Need
In order to test your golf cart motor, you will need a few tools.
We have listed the tools that you will need for the job below:
- Screwdriver
- Pliers
- Wrench
- Volt meter or multimeter
If you have these tools, you can test your golf cart motor with ease.
However, if you do not have these tools, you may want to consider taking your golf cart to a mechanic or grabbing these affordable tools from the hardware store.
They will be able to test the motor and diagnose any problems.
Still Stuck?
There are many issues that can arise besides the motor, especially if your golf cart isn’t running.
Check out our full walkthrough of what to look for, how to test each, and some possible fixes in our guide on what to do when your golf cart won’t start.
How To Test A Golf Cart Motor: Wrapping Things Up
So, if you are looking for how to test a golf cart motor, follow the steps outlined in this article.
With the right tools and instructions, it can be a relatively easy process.
What make and model of golf cart do you have, and what was the issue with yours? Let us know in the comments below.
Check out our other helpful golf cart guides while you’re here:
- Finding golf cart repair near me
- The best golf cart bluetooth speakers
- The best golf cart locks
- Installing a golf cart roll cage
- How to install a golf cart car seat
- How much does a golf cart weigh?
- Golf cart dimensions