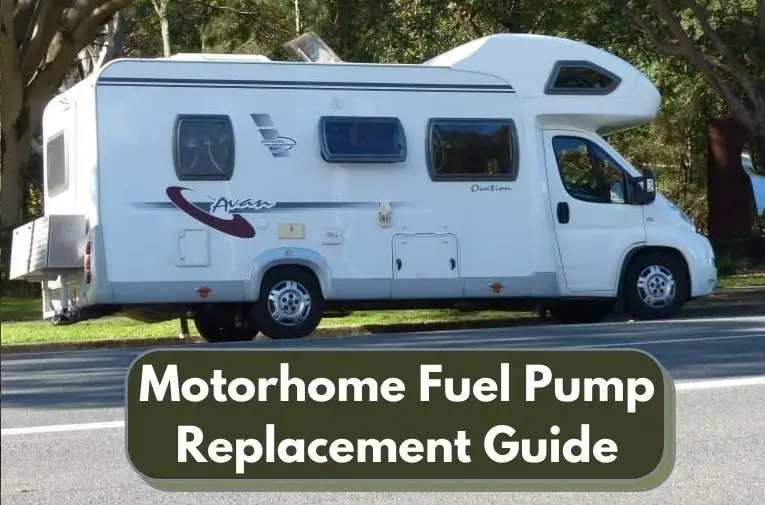
So you’re getting ready to take your RV out – or perhaps you’re already out – and your RV won’t start, stalls, or maybe your gas mileage is lower than usual. If these things are happening, it may be time for a motorhome fuel pump replacement.
Fortunately performing an RV fuel pump replacement is a pretty simple task, which we’ll walk you through in today’s guide.
Bad Motorhome Fuel Pump Symptoms
There are 5 telltale signs that it’s time to replace the fuel pump in your RV or motorhome:
Low Gas Mileage
Your motorhome fuel pump has a little valve inside of it called a check valve that may not be working properly. When the check valve is clogged or malfunctioning, it won’t be able to keep the proper pressure, resulting in low gas mileage.
Your Fuel Tank Has A Whining Sound
A properly-working RV fuel pump should hum, not whine. If the pump is blocked by engine, dirt, gasoline impurities, or other gunk, the blockage will cause the fuel pump to whine. These blockages also put extra stress on the fuel pump, causing it to work harder than intended and will make it go bad faster.
No Power When Accelerating
If you are experiencing loss of acceleration power when going up hills or hitting the gas pedal, your fuel pump may not be delivering fuel as intended. This can also lead to an engine shutdown and a potential safety risk, so don’t delay on repairing your RV’s fuel pump if this is your situation.
Trouble Starting The Engine
When your engine is on, the fuel pump is constantly running. If it’s starting to wear out, it can’t deliver the initial fuel required by the engine to get things going. Clearly this is a problem you can’t ignore and it’s time to replace your motorhome fuel pump.
Your Engine Stalls In High Temperatures
This may be a sign that just the motor in the RV fuel pump is going bad, and you may have the option of only replacing the motor or just swapping out the entire fuel pump depending on its age.
How To Test A Motorhome Fuel Pump
Before we get into this process, we want to be clear that you will need some general mechanical know-how or at the very least a family member or friend who is mechanically inclined.
Access to tools is going to help quite a bit too.
Follow these steps to test your RV fuel pump:
- Step 1: Check the fuse box to see if any are blown, replacing any that need it.
- Step 2: Check your pump with a volt meter or multimeter and make sure electricity is making it into the fuel pump. If your RV fuel pump isn’t getting electricity, it may be an issue with the fuel pump relay instead.
- Step 3: Check your fuel filter to see if it is dirty, clogged, or needs to be replaced.
- Step 4: Test the fuel pump’s pressure with a pressure gauge. If it’s out of specifications you may have a faulty motorhome fuel pump or fuel pump check valve that needs to be swapped out for a new one.
- Step 5: Check to see if your RV has an inertia fuel pump switch and/or oil pressure switch. These switches are designed to cut off the fuel supply in the event of an accident to prevent fires and can sometimes be accidentally turned off, cutting off the fuel or oil from flowing to your vehicle’s necessary parts.
Motorhome Fuel Pump Replacement Cost
So how much does it cost to replace an RV fuel pump?
The cost of this repair depends on the make and model of your rig and the cost of labor in the specific shop you pick, but expect to spend between $800-$1,600 to replace a motorhome fuel pump in a shop.
If you elect to try it yourself, the average part cost of an RV fuel pump is between $400-$600 and will take you between 4 to 6 hours to complete.
If you’re looking to save some money on replacing your camper’s fuel pump, read on.
Motorhome Fuel Pump Replacement Guide
Follow the steps listed below in order to replace your RV fuel pump and you’ll be back on the road in no time.
Step 1: Locate Your RV’s Fuel Pump
The location of your motorhome’s fuel pump will vary by the make and model of your rig, and some may even have two separate fuel pumps.
It may be located at the motor or in the fuel tank (or both).
If your fuel pump is in the tank, you’ll need to drop the entire gas tank to access it.
Other times if you are dealing with an electronics-related issue suchs as a fuel pump relay, the electronics may be separately located and the repair will be much simpler.
We’re sticking to actually replacing the motorhome fuel pump in this guide, so carry on to step 2 if this fits your situation.
Step 2: Disconnect The Battery
Disconnect the battery – you’re working with fuel here, so all necessary precautions are in order. You don’t want any chance of a spark or electricity running through while you’re working on your RV anyway, so disconnect the battery.
Step 3: Drain The Fuel From Your Tank
RV gas tanks are big and hold lots of fuel, and it’s not safe or even possible to lower a gas tank that is full, so you’ll need to drain it.
Follow this video for some tips on draining your RV’s gas tank:
Step 4: Loosen Or Remove The Fuel Tank Filler Neck
Locate the filler neck mounting bolts or remove the filler tube from the tank.
Doing this will make it easier on you to remove the tank when we get to that step.
Step 4: Remove The Fuel Lines And Electrical Connectors
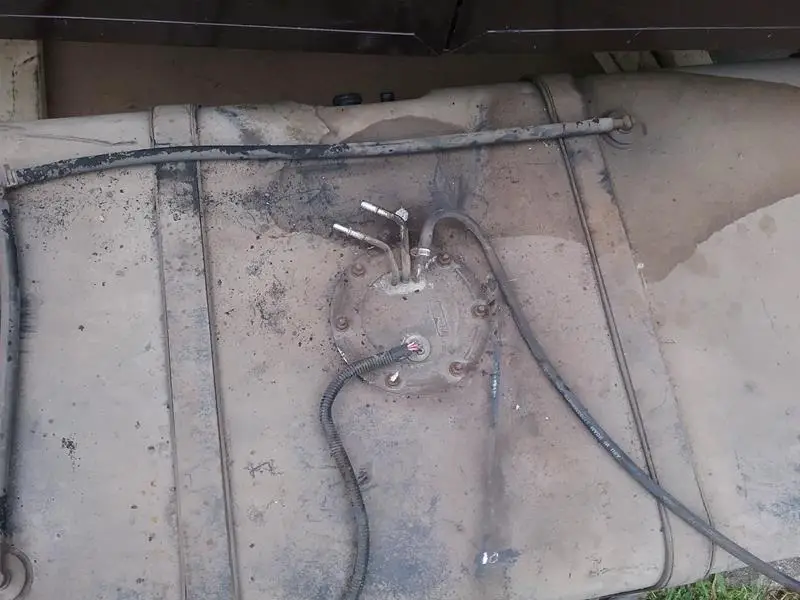
Disconnect the fuel lines and electrical connectors as well.
Inspect the electrical connectors, looking for any heated or burned spots, as a burned connector can cause an RV fuel pump to fail as well – replace these if needed.
Note that fuel will leak when you disconnect the fuel line, so be ready to catch it with a bowl or basin.
Here’s a good video that shows you how to undo the RV fuel line couplers:
Step 5: Support The Tank Before Removal
Even if your RV’s fuel tank is empty, it’s still heavy – DO NOT undo the straps holding it in place until it is supported by something else.
You can use a jack, pieces of wood, or even heavy duty ratchet straps to safely hold it in place while you remove the supports.
Step 6: Remove The Fuel Tank Straps & Lower The Tank
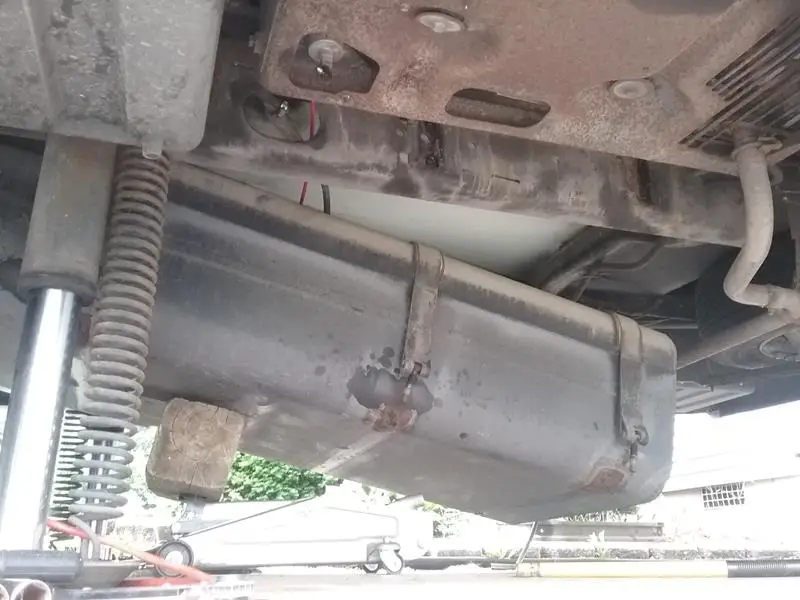
Locate and loosen the tank holder supports – there are usually two of these, but there may be more depending on the model of your RV.
Once undone, lower the tank and release any top-mounted fuel lines or electrical connections.
Step 7: Undo The Fuel Pump Retainer Ring
Before removing the fuel pump retainer ring, clean the area with an aerosol cleaner, which will prevent any debris or dirt from falling into the tank.
Remove the fuel pump mounting bolts or retainer ring to access the RV fuel pump and remove it.
You may need to use a hammer and punch to move the ring counterclockwise to release the fuel pump.
Step 8: Remove The Fuel Pump And Sender Module
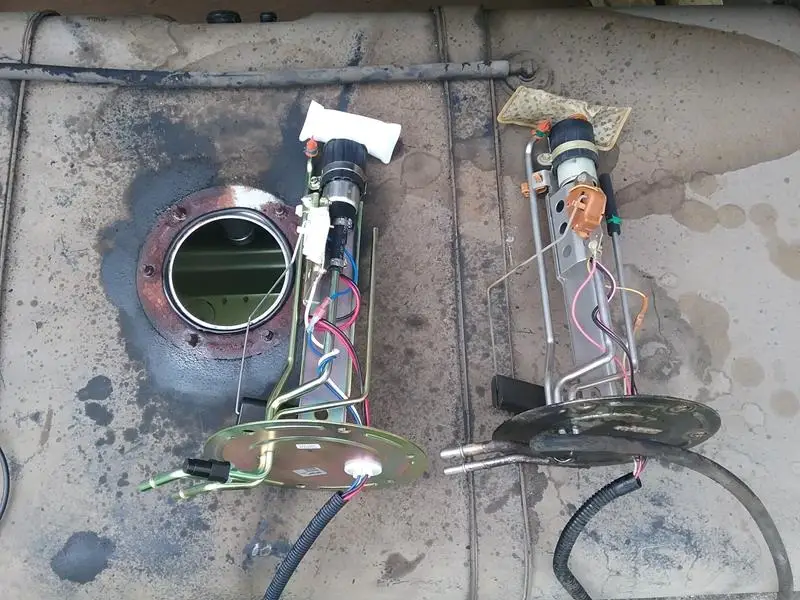
Remove the pump which will likely be attached to a mounting plate or positioned down inside the tank held by clips.
Inspect your old pump and compare it to your new one before replacing it to make sure everything looks similar.
Step 9: Clean The Area And Install Any Other Fuel Pump Related Items
Follow the manufacturer’s instructions and install the gas level float arm and pump strainer as required.
Make sure to clean your mounting and seal surfaces using carburetor cleaner and a shop towel to make sure you get a nice, tight seal.
Install a new O-ring gasket or seal before installing your new motorhome fuel pump.
Step 10: Replace The Motorhome Fuel Pump
Lower the pump into the tank and reinstall everything the same way it was when you took out the bad RV fuel pump.
Step 11: Put It All Back Together
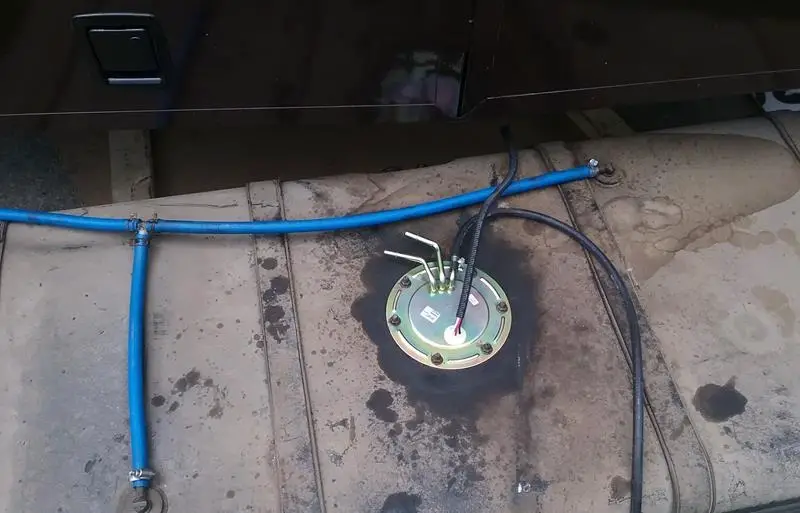
Follow the steps in reverse order to get everything back to square one.
If your RV or motorhome has a secondary fuel pump located outside of the fuel tank, you may need to replace it as well.
Motorhome Fuel Pump Replacement Guide – Wrapping Things Up
We hope we helped you solve your problem and you were able to replace your RV’s fuel pump successfully using this walkthrough.
If you have any comments or tips for your fellow RVers, please share them in the comments below.
If you’re into DIY on your RV, check out our guides to RV diesel water heaters, how to replace RV window glazing bead, what to do if your RV toilet won’t hold water, and how to fix an RV air conditioner freeze up while you’re here.

