
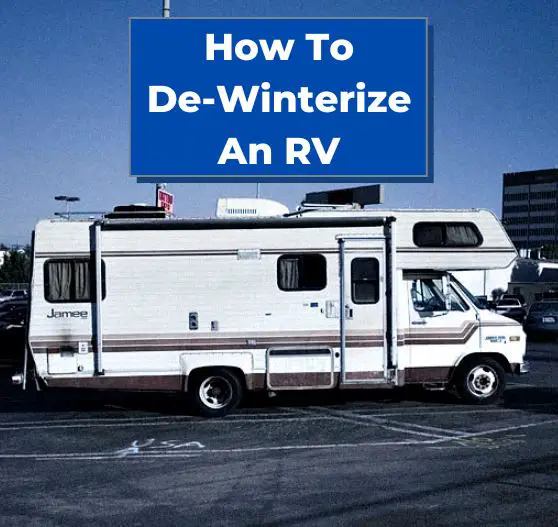
When winter ends and the weather starts to warm up, it’s time to get your RV or camper out of storage and prepare it for the upcoming camping season. One of the most important steps in this process is de winterizing your RV. Knowing how to de winterize an RV typically involves reversing the steps you took to winterize it, which includes flushing out the antifreeze and making sure all the water lines and tanks are clean and ready to use. There is a bit more to it than that though, which we’ll cover in today’s guide.
Inspecting the RV or Camper
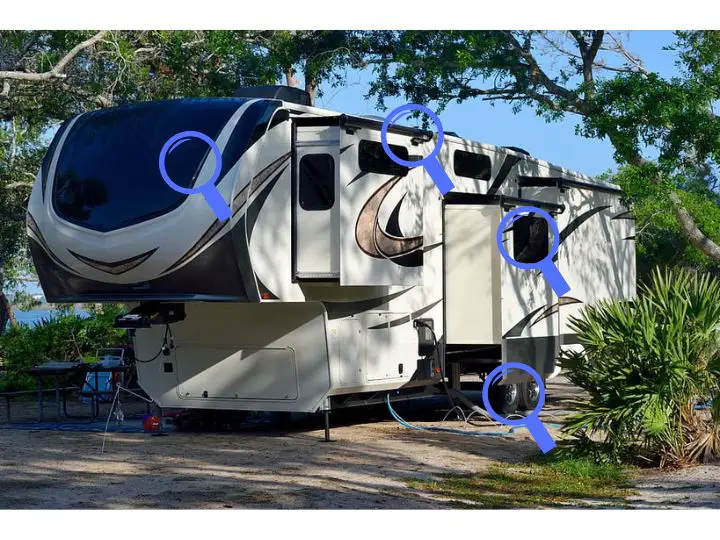
Exterior Inspection
Before taking your RV or camper out of storage, it’s important to inspect the exterior for any damage that may have occurred during the winter months.
Start by performing a thorough walkaround of your RV and look at the condition of windows, window seals, paint, latches, doors, door seals, compartments, and all exterior components.
Climb up safely and inspect the roof. Look at seams along the edges and around all roof vents, antennas, A/C units, etc.
Check for any cracks or leaks on the roof. Look for any signs of water damage around the roof vents, skylights, and air conditioning units.
Finally, check the seals around the doors and windows1, and replace any that are worn or damaged.
Finally, check and test all exterior lights to ensure they are working properly, including the headlights, taillights, brake lights, and turn signals. Replace any bulbs that are burned out or not functioning properly.
Interior Inspection
Once the exterior has been inspected, it’s time to move on to the interior. Start by checking the batteries and ensuring they are fully charged. Test the smoke detectors and carbon monoxide detectors to ensure they are working properly.
Next, check the plumbing system for any leaks or damage. Turn on the water pump and check for any leaks under the sink or around the toilet. Check the water heater and ensure it is functioning properly.
Inspect the appliances, including the refrigerator, stove, and microwave, to ensure they are working properly. Check the propane system for any leaks or damage. Finally, inspect the interior for any signs of water damage or pests.
Check Your RV Tires
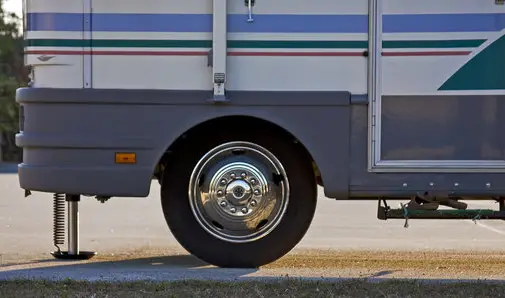
Before hitting the road after a long winter, it’s important to check your RV’s tires. Over time, tires can lose air pressure, which can lead to uneven wear and even blowouts. Here are some steps to follow when checking your RV tires:
- Check the tire pressure: Use an air inflation gauge to check the pressure of each tire when they are cold. Inflate them to the correct pressure according to the manufacturer’s guidelines.
- Inspect the tires: Look for signs of wear, such as cracks in the sidewalls and worn down treads. If you notice any significant damage, it may be time to replace your tires.
- Check the tread depth: Use a tread depth gauge to check the depth of the tire treads. If the treads are worn down to 2/32 of an inch or less, it’s time to replace the tires.
- Check the age of the tires: Even if your tires look fine, they may still need to be replaced if they are more than six years old. Over time, the rubber can break down and become less reliable, and you don’t want to find that out the hard way while on the road.
By following these steps, you can ensure that your RV tires are in good condition and ready for the road. It’s also a good idea to carry a spare tire and a tire repair kit with you in case you run into any issues on the road.
Here’s a helpful video from RV Education 101 on how to inspect your RV tires:
Charge And Reinstall Your Camper’s Batteries
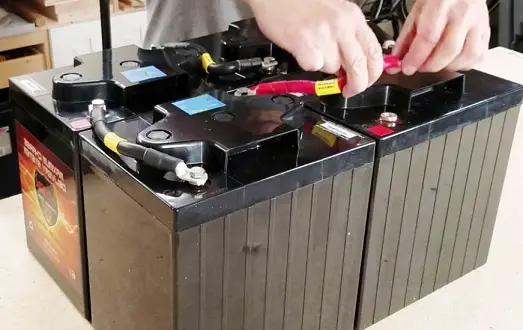
Most people remove their RV batteries when they store the vehicle for the winter. This practice ensures that the battery maintains a regular temperature and doesn’t freeze during the storage period.
Before reinstalling the battery, ensure that it’s fully charged and topped up with water (if applicable). Check with a multimeter for the minimum reading of 12 volts. You will need your battery hooked up to perform the next steps.
Attach the battery charger to the RV charger while the battery charger is turned off. Turn the battery charger on and allow the battery to fully charge. Depending on the battery size, your RV batteries may need to charge for a few hours or even a few days.
Once the battery is fully charged, reinstall it in your camper. Make sure to connect the terminals correctly and double check the connections and tighten them well.
Refill or Replace Your Propane Tanks
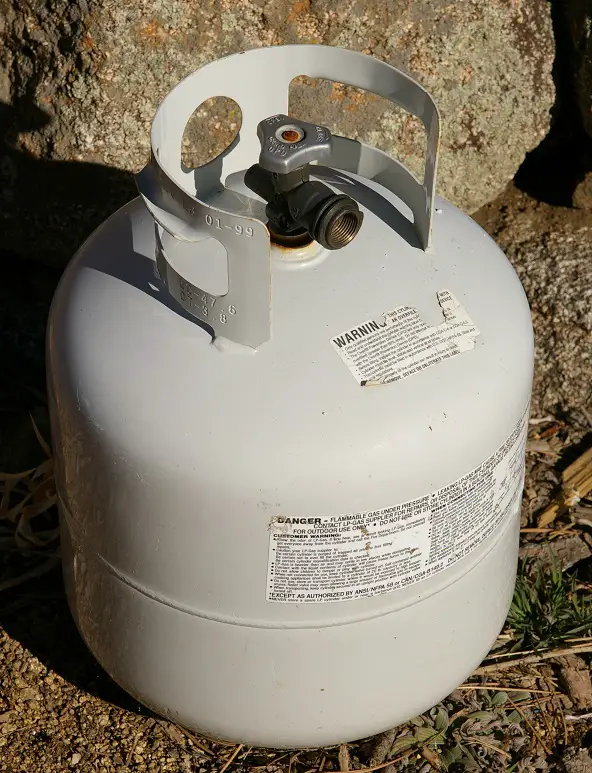
Propane is an essential component of any RV or camper, as it powers the stove, refrigerator, furnace, and water heater. Before using your RV or camper, you need to refill or replace your propane tanks.
If your propane tanks have been sitting idle all winter, it’s crucial to check them for leaks and damage. Inspect the hoses, fittings, and valves for any cracks or signs of wear and tear. If you notice any damage, replace those parts immediately.
When it comes to refilling your propane tanks, you have a few options. You can either refill them at a propane filling station or exchange them for new ones at a propane exchange location.
Refilling your tanks is typically cheaper than exchanging them, but it can take a little more time.
When refilling your propane tanks, make sure to fill them to no more than 80% capacity. Overfilling your tanks can cause them to burst or leak. You should also turn off all propane-powered appliances and pilot lights before refilling your tanks.
It’s important to note that propane tanks have a lifespan of 12 years. If your propane tanks are nearing the end of their lifespan or are due for recertification, it’s best to replace them rather than refill them.
When replacing your propane tanks, make sure to choose the right size for your RV or camper. You can consult your owner’s manual or speak with a professional to determine the appropriate size.
Overall, refilling or replacing your propane tanks is a crucial step in dewinterizing your RV.
Flushing the Water System
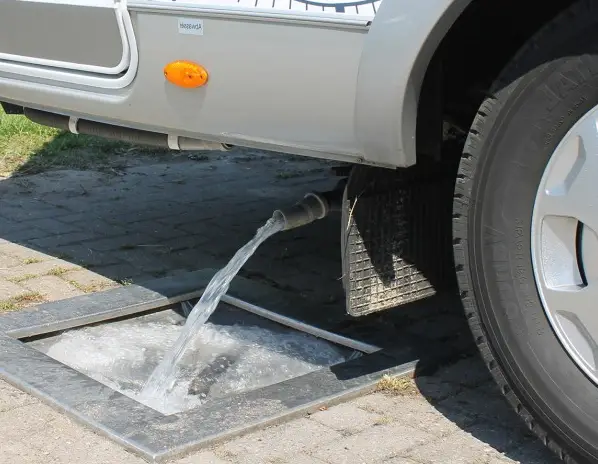
Te next step in dewinterizing an RV or camper is to remove the antifreeze and flush the water system.
First, fill the fresh water tank with clean water. Then, turn on the water pump and open all the faucets, including the shower and toilet, until the water runs clear. This can take several minutes.
It’s also a good idea to flush the hot water tank separately. Turn off the water pump and drain the hot water tank. Then, close the drain valve and refill the tank with clean water. Turn the water pump back on and open all the hot water faucets until the water runs clear.
It’s important to note that some RVs and campers may have a built-in water filtration system. If this is the case, it’s still recommended to sanitize the water system after flushing it because the filter may not remove all bacteria or other contaminants.
Check out this video showing the RV water system dewinterization process:
Sanitizing the Water System

After de-winterizing the RV water system, it is important to sanitize it to ensure that it is free of harmful bacteria and other contaminants. Sanitizing the RV water system involves the following steps:
- Fill the fresh water tank with a solution of one-quarter cup of household bleach for every 15 gallons of water.
- Turn on the RV water pump and open all of the faucets (hot and cold) to allow the solution to run through the entire water system.
- Let the solution sit in the water system for at least 12 hours.
- Drain the water system completely and refill the fresh water tank with potable water.
- Run the water through the entire system again, opening all of the faucets (hot and cold), until the bleach smell is gone.
It is important to note that the bleach solution should not be used in the freshwater tank for more than 24 hours, as it can damage the tank. Additionally, the water heater should be turned off during the sanitization process to prevent damage to the heating element.
Once the water system has been sanitized, it is important to regularly maintain it to prevent the growth of harmful bacteria and other contaminants. This can be done by regularly flushing the water system with fresh water and using a water filter to remove impurities.
Check Your Plumbing System For Leaks
Once you’ve drained, flushed, sanitized, and refilled your water system, you should next check for any leaking pipes in your rig.
Turn on the electric water pump and get everything re-pressurized, and wait for the pump to shut off.
Listen for the pump turning back on, and if so, it means you could have a leak somewhere.
Visually inspect under sinks, around the toilet, and anywhere else plumbing runs in your rig to make sure there are no leaks, and address any leaks you find immediately.
Testing the Appliances and Systems
After de-winterizing your RV, it’s important to test all of the appliances and systems to ensure they are in proper working order. This will help you identify any potential problems before you hit the road.
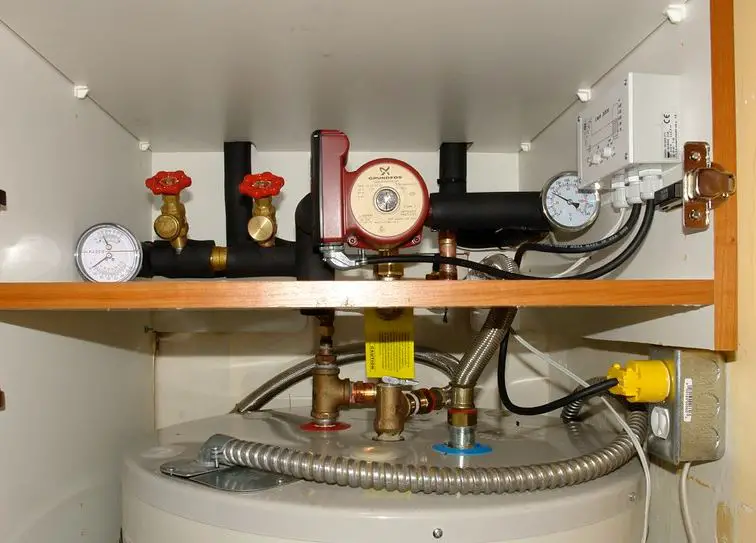
Water Heater
The water heater is an important component of your RV, especially if you plan on using hot water during your travels. To test the water heater, turn it on and let it run for a few minutes. Check the temperature of the water to make sure it’s heating properly. You should also check for any leaks around the water heater.
Furnace
The furnace is another important part of your RV, especially if you plan on traveling in colder weather. To test the furnace, turn it on and let it run for a few minutes. Check to make sure it’s blowing warm air and that the temperature is adjusting properly. You should also check for any unusual noises or smells.
Air Conditioner
The air conditioner is essential for keeping your RV cool during hot weather. To test the air conditioner, turn it on and let it run for a few minutes. Check to make sure it’s blowing cold air and that the temperature is adjusting properly. You should also check for any unusual noises or smells.
Refrigerator
The refrigerator is important for keeping your food and beverages cold during your travels. To test the refrigerator, turn it on and let it run for a few hours. Check to make sure it’s cooling properly and that the temperature is adjusting as needed. You should also check for any leaks, smells (like ammonia) or unusual noises.
By testing these appliances and systems, you can ensure that your RV is ready for your next adventure. If you notice any problems, it’s important to address them before hitting the road.
Test Your Camper’s Electrical System
Before hitting the road, it’s important to ensure that your camper’s electrical system is in good working order. This will help prevent any issues on the road and keep you and your passengers safe. Here are a few steps to test your camper’s electrical system:
Step 1: Test the Outlets
Next, test the outlets in your camper to ensure that they are working properly. Plug in a small appliance, such as a hair dryer or phone charger, and make sure it works. If an outlet is not working, check the breaker box to see if a breaker has tripped.
Step 2: Make Sure Your RV Inverter Is Working
Make sure the RV’s power inverter is working by checking the input voltage which should be 12V. Then check the output voltage to ensure it’s 120V.
If both are reading these measurements, you’re good to go.
Restock Emergency and First Aid Supplies
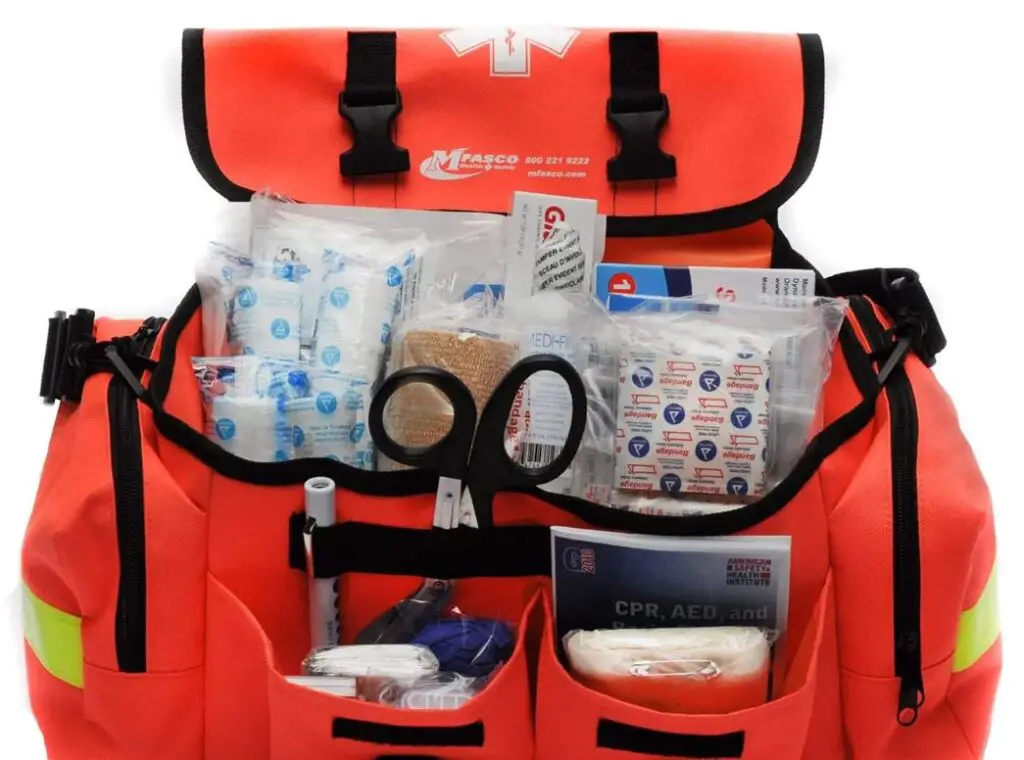
Restocking your RV’s emergency and first aid supplies is an important step in preparing for the upcoming season. It’s important to make sure you have everything you need in case of an emergency or unexpected situation. Here are some tips to help you restock your emergency and first aid supplies:
- Check the stock of your emergency supplies and restock any items that need it.
- Throw out any expired medications and dry food.
- Make sure you have enough bottled water for emergency use.
- Check your first aid kit and make sure it’s fully stocked with all the necessary items like bandages, antiseptic, and pain relievers.
- Consider adding items such as a fire extinguisher, a flashlight, and a whistle to your emergency supplies.
By taking the time to restock your emergency and first aid supplies, you’ll be better prepared for any unexpected situations that may arise during your travels. It’s always better to be safe than sorry, and having the right supplies on hand can make all the difference in an emergency.
Double-Check Your RV Insurance And Registration
Before hitting the road, it is important to ensure that your RV insurance and registration are up to date. Double-checking these items can save you from potential legal and financial troubles down the road.
First, check your RV insurance policy to ensure that it is current and provides adequate coverage for your needs. This may include liability coverage, collision coverage, comprehensive coverage, and more. Make sure to review the terms and conditions of your policy, including any deductibles or exclusions.
Next, verify that your RV registration is current and up to date. This will ensure that you are legally allowed to operate your RV on public roads. Check with your state’s Department of Motor Vehicles (DMV) to see if there are any specific requirements or regulations that you need to follow.
If you plan on traveling to other states or provinces, be sure to research the local laws and regulations regarding RV insurance and registration. Some states may require additional coverage or registrations, while others may have different requirements for RVs than passenger vehicles.
By double-checking your RV insurance and registration, you can have peace of mind knowing that you are legally and financially protected while on the road.
Replace Your RV’s Air And Water Filters
One important step in de winterizing an RV is to replace its air and water filters. Over time, these filters can become clogged with debris, reducing the efficiency of your RV’s systems and potentially causing damage.
When replacing the air filter, first locate the filter compartment. This is typically located near the engine or in the cabin of the RV. Remove the old filter and dispose of it properly. Then, insert the new filter, making sure it is securely in place. Consult your RV’s owner manual or a professional mechanic if you are unsure of how to replace the air filter.
Replacing the water filter is also important for ensuring clean and safe drinking water while on the road. The location of the water filter will vary depending on your RV’s make and model. Consult your owner’s manual or a professional mechanic for guidance on locating and replacing the water filter.
When replacing the water filter, it is important to choose the correct type of filter for your RV. There are a variety of water filters available, including carbon filters and sediment filters. Carbon filters are effective at removing chlorine and other chemicals from the water, while sediment filters are designed to remove dirt, sand, and other particles. Consider your specific needs when selecting a water filter for your RV.
Regularly replacing your RV’s air and water filters is a simple but important step in maintaining your RV’s systems and ensuring a safe and comfortable trip.
Repack Your Camper’s Wheel Bearings
One of the most important steps in de winterizing your RV or camper is repacking the wheel bearings. Neglecting this task can lead to premature wear and tear on your tires and even cause dangerous accidents on the road. Here are the steps to repack your camper’s wheel bearings:
- First, jack up the camper and remove the wheel and hub assembly from the axle spindle.
- Next, remove the outer bearing and clean it with a solvent.
- Inspect the bearing for any signs of wear, such as pitting, cracking, or discoloration. If the bearing is damaged, replace it with a new one.
- Use a bearing packer (or your hands) to apply new grease to the bearing. Make sure the grease is evenly distributed throughout the bearing.
- Reinstall the outer bearing and hub assembly onto the spindle.
- Repeat steps 2-5 for the inner bearing.
- Finally, adjust the wheel bearing to the recommended torque specifications and reinstall the wheel onto the hub assembly.
It’s recommended to repack your camper’s wheel bearings every 10,000 to 12,000 miles or at least once a year, whichever comes first. If you frequently travel on rough roads or in extreme weather conditions then you may need to repack them more often.
Here’s a helpful video from Brazen Brits showing how to repack RV wheel bearings:
If you’re not comfortable performing this task yourself, it’s best to have an RV repair center do it for you. Neglecting to repack your camper’s wheel bearings can lead to costly repairs and even put your safety at risk.
Do A Spring Cleaning

After the RV has been dewinterized, it’s time to do a thorough spring cleaning. This will help ensure that the RV is clean and ready for use. The cleaning should start from the top and work down to the bottom.
First, clean the roof of the RV. Remove any debris or leaves that may have accumulated during the winter. Check for any damage or leaks that may have occurred during the winter.
Next, clean the exterior of the RV. Use a mild detergent and a soft brush to clean the exterior. Rinse thoroughly with water. Check for any damage or cracks in the exterior.
After the exterior is clean, move on to the interior of the RV. Start by cleaning the floors. Use a vacuum or broom to remove any dirt or debris. Then, mop the floors with a mild detergent.
Next, clean the walls and ceiling of the RV. Use a soft brush or cloth to remove any dust or dirt. If there are any stains, use a mild detergent and water to clean them.
Finally, clean the appliances and furniture in the RV. Use a mild detergent and water to clean the appliances. Use a soft cloth to clean the furniture.
By following these steps, the RV will be clean and ready for use. It’s important to do a spring cleaning every year to ensure that the RV is in good condition and ready for use.
When Should I De Winterize My RV?
Knowing when to dewinterize your RV is crucial to ensuring that it is in good condition for the upcoming camping season. Generally, it is recommended to dewinterize your RV or camper in the early spring once the temperatures start to consistently stay above freezing.
If you live in an area with milder winters, you may be able to dewinterize your RV earlier than someone living in a colder climate. It’s important to keep an eye on the weather forecast and make sure that there are no more freezing temperatures expected before you begin the camper de-winterization process.
It’s also important to consider how long your RV has been in storage. If it has been stored for an extended period of time, it’s a good idea to do a thorough inspection before the time comes to start your RV dewinterization. This can help you get ahead of and address any potential issues that could get in your way and delay your project.