

Maintaining an RV black water tank can be a daunting task for many RV owners. It’s really important to keep the tank clean to avoid unpleasant odors and prevent damage to the RV’s plumbing system. Knowing how to flush and clean the black water tank in your RV is a crucial step in maintaining a functional RV.
To properly flush and clean your RV black water tank, you’ll first drain the tank. Next, you’ll fill it with fresh water and drain the tank a second time, then flush it out with clean water. To clean your RV black tank, you can add cleaners or enzymes and fill it with water. Drain your black tank again and it’ll be clean.
By following the proper procedures for flushing and cleaning an RV black water tank, RV owners can ensure a more comfortable and pleasant camping experience. With the right knowledge and tools, maintaining an RV black water tank can be a simple and effective process.
We’ll walk through everything you need to know in this guide.
Understanding the Black Water Tank
Black water tanks are a crucial component of any RV or travel trailer’s plumbing system. Understanding the purpose and components of a black water tank is essential for proper maintenance and use.
Components of a Black Water System
A black water system consists of several components that work together to collect and store waste from an RV’s toilet. These components include:
- Black Water Tank: This is the main storage tank for waste from the RV’s toilet. It is typically located underneath the RV and can hold anywhere from 15 to 60 or more gallons of waste.
- Toilet: The toilet in an RV is connected to the black water tank via a pipe. It is important to use RV-specific toilet paper to prevent clogs and damage to the tank.
- Valve: A valve is located between the toilet and the black water tank. This valve allows waste to flow from the toilet into the tank and prevents odors from escaping.
- Vent Pipe: A vent pipe is located on the roof of the RV and allows odors to escape from the black water tank.
- Dump Valve: The dump valve is located underneath the RV and allows for the emptying of the black water tank. It is important to properly empty and clean the tank to prevent odors and damage.
Understanding the components of a black water system is essential for proper maintenance and use of an RV’s plumbing system.
How To Flush Your Black Water Tank Step by Step
Flushing your black water tank is an essential part of maintaining your RV’s sanitation system. Here’s a step-by-step guide on how to flush your black water tank properly.
Preparation Before Flushing
Before flushing your black water tank, make sure that you have all the necessary tools and supplies. These include:
- Rubber gloves
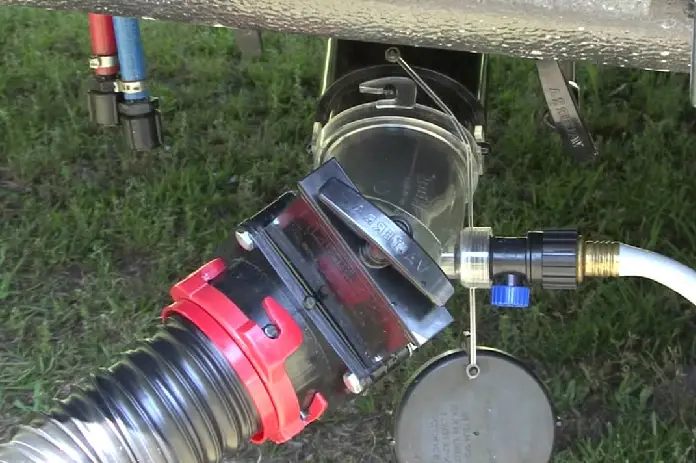
- A sewer hose
- A sewer hose support
- A black tank flush system (optional)
- A water hose
- A bucket
- Black tank cleaner (optional)
- Disinfectant or enzyme treatment (optional)
Tools You’ll Need
To flush your black water tank, you’ll need to have access to a dump station or sewer hookup. You’ll also need to have a water source nearby, such as a city water hookup or a fresh water tank.
Empty Your Black Water Tank
The first step in flushing your black water tank is to empty it completely. Make sure that the valve is open and that the sewer hose is securely attached. Allow the black tank to drain completely before closing the valve.
See Related: Where to Dump RV Black Water
Close The Valves
Once the black water tank is empty, close the valve and attach the sewer hose support. This will help prevent any backflow or leaks.
Flush Your RV Toilets A Few Times
Next, flush your RV toilets a few times to help loosen any remaining waste or debris. This will also help fill the black water tank with water, which is necessary for the next step.
Empty Your Black Water Tank a Second Time
After flushing your RV toilets, empty the black water tank a second time. This will help remove any remaining waste or debris.
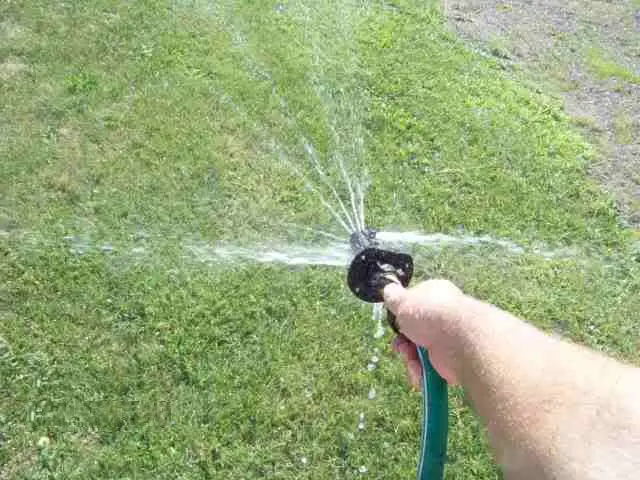
Flush The Black Tank Out With Clean Water
If your RV has a black tank flush system, use it to flush the black water tank with clean water. If you don’t have a flush system, use a water hose to flush the tank out. Allow the water to run for several minutes to ensure that the tank is thoroughly flushed.
Add Cleaners, Disinfectants, or Enzymes (Optional)
If desired, add black tank cleaner, disinfectant, or enzyme treatment to the black water tank. This will help break down any remaining waste or debris and keep your RV’s sanitation system clean and fresh.
Empty Your Gray Water Tank (Do This Last!)
Finally, empty your gray water tank. This will help flush out any remaining waste or debris from the sewer hose. Make sure that the valve is closed and that the sewer hose is securely attached before opening the valve.
By following these steps, you can flush your black water tank properly and keep your RV’s sanitation system in good working order.
RV Tank Treatment Options
When it comes to keeping your RV’s black water tank clean and odor-free, there are several treatment options available. Here are a few of the most popular options:
The GEO Method
The GEO Method is a popular tank treatment option that involves using water softener, detergent, and bleach to clean and maintain your RV’s black water tank. To use this method, simply mix one cup of water softener, one cup of laundry detergent, and one cup of bleach in a gallon of hot water. Pour the mixture into your tank and add enough water to fill the tank. Let the mixture sit for at least 24 hours before draining the tank.
Use Bleach and Water
Another popular tank treatment option is to use bleach and water. To do this, add one cup of bleach for every 10 gallons of water in your tank. Let the mixture sit for at least 12 hours before draining the tank. Be sure to flush the tank thoroughly with clean water after draining.
Use Ice Cubes and Dish Soap
Using ice cubes and dish soap is another effective way to clean your RV’s black water tank. Simply fill your tank with ice cubes and a cup of dish soap, then drive your RV around for a while. The ice cubes will help to scrub the inside of the tank, while the dish soap will help to break down any waste and debris.
Use Dawn and Borax
Dawn and Borax are two common household items that can be used to clean your RV’s black water tank. To use this method, simply add a cup of Dawn dish soap and a cup of Borax to your tank, then fill the tank with water. Let the mixture sit for at least 12 hours before draining the tank.
Use Baker’s Yeast and Peroxide
Finally, using Baker’s Yeast and Peroxide is another effective way to clean your RV’s black water tank. To use this method, add a cup of Baker’s Yeast and a cup of hydrogen peroxide to your tank, then fill the tank with water. Let the mixture sit for at least 12 hours before draining the tank.
Remember to always follow the manufacturer’s instructions when using any tank treatment products.
Dealing with Clogs and Buildup
When dealing with an RV black water tank, clogs and buildup can be a common problem. Clogs can occur when waste, toilet paper, or other objects get stuck in the pipes leading to and from the black tank. Buildup can also occur over time, as waste and toilet paper accumulate on the walls of the tank.
To prevent clogs and buildup, it is important to use the RV toilet properly. This means using only RV toilet paper, not flushing any objects other than waste and toilet paper, and using enough water to ensure that waste is properly flushed out of the pipes.
If a clog does occur, there are several methods for dealing with it. One option is to use a plunger to try and dislodge the clog. Another option is to use a drain snake to break up the clog and clear the pipes.
If the clog is more severe or if there is buildup on the walls of the tank, it may be necessary to use a more powerful method.
See related: How to Clear a Blockage In An RV Holding Tank and Dealing With An RV Poop Pyramid.
Addressing Odors
One of the most unpleasant things about owning an RV is dealing with the odors that can come from the black water tank. However, it is possible to keep your bathroom odor-free with a few simple steps.
First, it’s important to make sure that the tank is properly maintained. This means regularly flushing the tank with clean water and using a high-quality RV toilet paper that breaks down easily. Additionally, adding a bacteria-based treatment to the tank can help break down waste and reduce odors.
If odors persist, it may be necessary to use a more aggressive approach. One option is to use bleach to clean the tank. However, it’s important to use caution when using bleach, as it can be corrosive and can damage the tank if used improperly. Be sure to follow the manufacturer’s instructions and dilute the bleach properly before adding it to the tank.
Another option is to use a commercial odor eliminator specifically designed for RV black water tanks. These products can be added directly to the tank and can help neutralize odors.
In addition to these steps, it’s important to keep the bathroom clean and well-ventilated. This can help prevent odors from building up and spreading throughout the RV. Regularly cleaning the toilet, sink, and shower can help keep the bathroom smelling fresh.
Proper Waste Disposal
When it comes to flushing and cleaning an RV black water tank, proper waste disposal is crucial. The following tips can help ensure that the process is done safely and effectively:
- Always use designated dump stations or facilities to dispose of wastewater. Dumping black water or any other type of wastewater on the ground or in a body of water is not only illegal but also harmful to the environment.
- Be mindful of the septic system at the campground or RV park. It is important to follow their guidelines and regulations for waste disposal to prevent any damage or contamination.
- Use backwash rinsers or sprayers to thoroughly clean the black water system. This will help prevent any buildup or clogs that can lead to unpleasant odors or malfunctioning of the system.
- Wear gloves and protective gear when handling wastewater to avoid any potential health hazards.
- Sanitize all hoses and connections after flushing and cleaning the black water tank. This will help prevent the spread of bacteria and ensure a clean and safe system for future use.
Frequently Asked Questions
It is recommended to flush your black tank every one to two months. It’s also a good idea to do a deep clean of your black tank at least once a year.
To drain your RV black tank, you will need to first locate the drain valve. This is typically located on the bottom of the tank and can be accessed from the outside of the RV. Once you have located the valve, connect a sewer hose to the valve and then open the valve to allow the contents of the tank to drain out.
No, it is not recommended to use your freshwater hose to flush your black tank. This is because your freshwater hose can become contaminated with bacteria and other harmful pathogens from the contents of your black tank. Instead, use a dedicated hose that is only used for flushing your black tank.
The length of time that you should flush your black tank will depend on the size of your tank and how dirty it is. As a general rule, you should flush your black tank for at least 10-15 minutes to ensure that it is thoroughly cleaned. However, if your tank is particularly dirty, you may need to flush it for longer.