
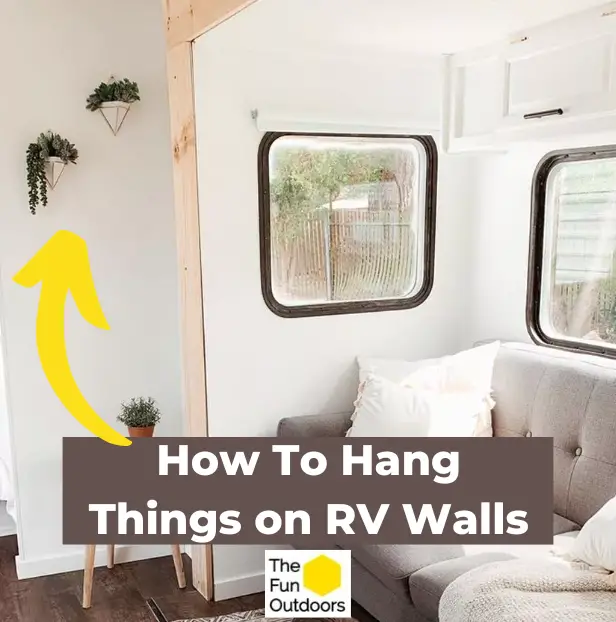
Traveling in an RV offers the comfort and convenience of a mobile home on wheels. However, making it truly feel like home requires adding personal touches, such as hanging pictures, decorations, or even installing shelves on the walls. This is where knowing how to hang things on RV walls come in.
RV walls are typically thin and may contain essential wiring or plumbing, which means traditional methods of using nails or screws may not be suitable. There are a variety of methods that can be used to mount items on RV walls without causing damage, including adhesive hooks or strips, small screws, and anchors carefully installed into wall studs.
Understanding the unique characteristics of RV walls and learning the best ways to hang objects will go a long way in personalizing your space while traveling.
In this article, we will explore a variety of techniques and tips for hanging items on your RV walls, ensuring your mobile home remains both safe and beautifully decorated.
Can You Hang Things On RV Walls?
Yes, you can hang things on RV walls, but it requires proper methods and tools to ensure their security and to prevent damage to the walls. Typically, RV walls are thin and filled with wires or plumbing, making it a bit challenging to mount items.
One common option is to use Command Hooks as they come in various sizes and strengths to accommodate different weights. Their adhesive backing makes them suitable for mounting on thin walls without causing any damage.
Another method for hanging objects on RV walls is using hooks and eyes. These are ideal for hanging small items like pictures or mirrors and can easily be mounted on the wall. Hooks and eyes can be purchased at most hardware stores.
For larger metal pieces, magnetic mounts can be used. These mounts utilize strong magnets to hold the objects in place, making it easy to install and take down without causing damage to the wall.
In addition to these methods, some RVers also rely on:
- Double-end tape: A strong adhesive tape that can be used to attach lightweight decorations to the wall.
- Nails and screws: Although more risky due to the potential for damaging wires or plumbing, small screws and nails can offer a secure hold for heavier items.
Remember, when hanging things on RV walls, it’s important to choose the correct method and tools based on the weight and type of object being mounted. This will ensure the safety and stability of the items while preventing any damage to the wall or the RV structure itself.
We’ll cover all the different options for hanging items on RV walls further in this guide.
How Much Weight Can An RV Wall Hold?
The weight capacity of an RV wall mainly depends on factors such as the material it’s made of and the age of the RV. On average, an RV wall can hold anywhere between 1,500 to 2,000 pounds before showing signs of stress.
RV walls are generally thinner than residential walls, with an approximate thickness of 2.5 inches. This difference in thickness affects their capacity to hold heavy items. Moreover, it is crucial to consider the location of studs, wires, and plumbing within the walls before installing any hooks or screws.
How To Hang Things On RV Walls
Command Hooks
Command Hooks are a popular choice for hanging items on RV walls because they are lightweight and don’t require screws, nails, or drilling. They have a strong adhesive that can handle different weights of items without damaging the wall. Depending on the weight rating, Command Hooks are great for hanging both light and heavy items on interior and exterior walls.
Alien Tape
Alien Tape is a strong, reusable double-sided tape that can be used to hang decorative items on your RV walls without needing screws or nails. Unlike Velcro, Alien Tape is transparent and leaves no residue when removed. The tape can be cut to size and works well for lightweight stuff.
Command Strips
For hanging items on RV walls without causing damage, Command Strips are an excellent option. These adhesive strips come in various weight ratings and can be removed without leaving any marks on the wall. Ideal for lightweight and slightly heavier objects, they eliminate the need for drilling or using wall anchors.
Acrylic Mounting Tape
Acrylic Mounting Tape is a strong, double-sided tape that offers an effective solution for hanging light to medium-weight items on RV walls. It is durable and weather-resistant, making it suitable for both indoor and outdoor use. Use caution when removing the tape to avoid causing damage to the wall surface.
Velcro
Velcro is a versatile option for hanging items on RV walls, as it provides a secure but easily removable fastening method. By attaching Velcro to both the wall and the item to be hung, you can avoid drilling permanent holes or using wall anchors. Velcro works best for lightweight items but may not be suitable for heavy objects.
Museum Putty
Museum Putty is a removable and reusable putty that can be used to hang lightweight, decorative items on RV walls. It holds items securely and can be easily removed without causing damage to the wall. Since it’s designed for delicate objects, Museum Putty may not be suitable for heavy items.
Foam Mounting Tape
Foam Mounting Tape is another adhesive option for hanging items on RV walls. It is easy to apply and can hold various weights, but may not be ideal for heavy items. Like other adhesive methods, it’s important to remove the tape carefully to avoid damage to the wall surface.
Metal Self-Drilling Wall Anchors
For heavier items, Metal Self-Drilling Wall Anchors can be used to hang things on RV walls securely. These anchors require drilling, but they provide a strong hold without the need for additional screws or nails. Be cautious when drilling; avoid wires and plumbing hidden within RV walls.
Construction Adhesive
Construction Adhesive is a strong glue suitable for bonding heavy items to RV walls. This option provides a long-lasting hold, but it may leave residue or cause damage to the wall if you decide to remove the item later. Apply the adhesive according to the manufacturer’s instructions for best results.
Pop Rivets
Pop Rivets are a secure method for hanging heavy items on RV walls. They involve attaching hardware to the wall with the help of a rivet gun. While this method is strong, it also requires drilling holes and potentially poking through wires and plumbing.
Gorilla Hooks
Gorilla Hooks are heavy-duty, easy-to-install hooks for hanging bulky items on RV walls. These hooks have a weight rating of up to 40 pounds and do not require drilling or screws. Instead, they penetrate the wall surface with a small hole and provide a secure hold for your items. Use caution when inserting and removing the hooks to avoid causing damage to the wall.
Hanging Specific Items
Installing Shelves
When installing shelves on RV walls, it is important to first identify the type of wall material and its sturdiness. For thin wall panels, use hollow door anchors or sheet metal screws with a pilot hole. Consider using adjustable or collapsible shelves to save space while parked and during travel. Remember to:
- Measure the wall space and shelf dimensions
- Mark the location of the anchor points
- Drill pilot holes and install appropriate hardware
- Attach and secure the shelf brackets and shelf
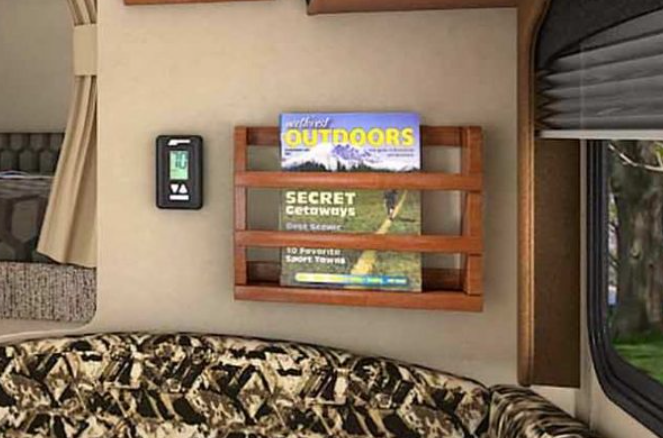
Hanging Art and Pictures
Hanging art and pictures adds a personal touch to your RV’s interior. To avoid damaging the walls, consider using:
- Double-ended tape
- Non-damaging adhesive strips
- Command hooks
For heavier items, you may need to use small screws or nails with caution, while being mindful of wires and plumbing within the walls.
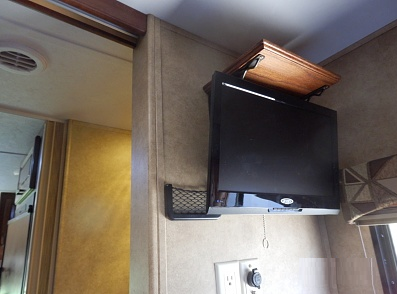
Mounting a TV
Mounting a TV in your RV can enhance your entertainment experience. To safely mount a TV, follow these steps:
- Choose an appropriate RV TV mount (swivel or stationary) based on your preferences and space constraints
- Identify a solid surface on the RV wall for mounting
- Mark the holes for the mounting brackets
- Drill pilot holes and install required hardware
- Attach the brackets to the TV and then to the wall mount
- Ensure the TV is secure and test the swivel action, if applicable
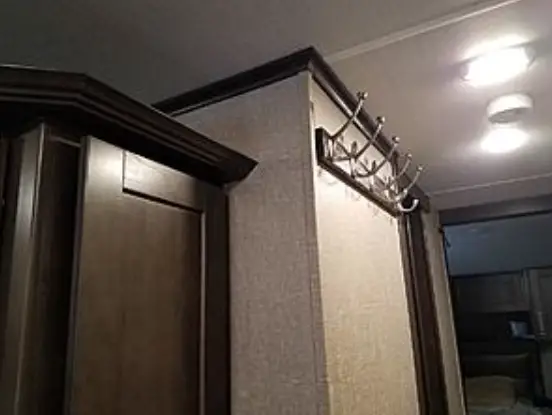
Towel Rack and Bathroom Accessories
Installing towel racks, towel bars, and other bathroom accessories in an RV is similar to hanging other items. Use hardware suitable for the specific wall material (sheet metal screws, hollow door anchors, or adhesive strips) and follow these steps:
- Measure and mark the locations for the hardware
- Drill pilot holes (if needed) and install appropriate hardware
- Attach accessories firmly to the hardware
- Ensure stability while allowing for easy access
Removable Hanging Options
When it comes to hanging items on RV walls without causing damage, there are several removable options available. These options allow RV owners to decorate their space and hang items securely while also giving them the peace of mind that they can be easily removed without damaging the walls.
Command Hooks
Command Hooks, a popular product by 3M, are a convenient choice for hanging items on RV walls. These hooks can be easily applied and removed, as they have an adhesive backing that does not leave any residue on the walls. They come in various sizes and weight capacities, making them suitable for various applications, such as hanging pictures, light decorations, or small items. The installation process is simple: clean the area on the wall, press the hook onto the surface, and let it sit for a short period before hanging anything on it.
3M Command Strips
Another solution from 3M is the Command Strips. These strips work in the same way as Command Hooks but offer a flat surface for attaching objects directly to the wall. They can be used to hang items such as picture frames and decorative accents without the need for screws, nails, or other tools that might cause damage to RV walls. Just like Command Hooks, it’s essential to clean the surface before applying the strips, and the removal process is hassle-free, leaving no residue or marks behind.
Quakehold
Quakehold, also known as Museum Putty, is designed to hold objects in place during earthquakes and other forces, making it an excellent option for securely hanging items on RV walls while on the move. This putty can be applied to the back of an object and adhered to the wall without causing any damage or marks when removed. Quakehold is an excellent option for lighter items such as small framed pictures or decorations and can be easily removed by gently twisting the object from the wall.
To sum up, the removable hanging options discussed here allow RV owners to safely and securely hang items on their walls. Command Hooks, 3M Command Strips, and Quakehold provide versatile solutions for a variety of applications, ensuring that these items stay in place while the RV is in motion and remain easily removable when needed.
Helpful Tips and Tricks
Using the Right Tools and Materials
When hanging items on RV walls, it’s important to use the right tools and materials. A stud finder can help locate studs in the wall, while a screwdriver and wood screws are necessary for fastening items securely. Items can be hung on various wall types, such as drywall, vinyl, or wood paneling. Pre-drilling holes with a small drill bit can help prevent splitting of the wall material. For non-invasive options, consider using magnets or adhesive hooks, especially for lightweight items.
Testing Weight Limits
Before hanging heavy items, it’s a good idea to test weight limits. Some walls may have difficulty supporting heavy items, so identify the limitations to avoid damaging the wall or causing potential safety issues. If you are unsure, it’s best to err on the side of caution and consult with an RV professional.
How To Find Studs In an RV Wall
To find studs in an RV wall, utilize a stud finder and carefully scan the surface. Mark the edges of the studs to ensure you can locate them later. Alternatively, you can use a strong magnet to find metal fasteners, indicating where a stud might be. This may not be as accurate as a stud finder, but it can be a helpful alternative.
Checking Walls Regularly
Once items are hung on the walls, it’s essential to check them regularly. Look for signs of sagging, loose screws, or any indications that the wall is stressed. Regularly inspecting the walls and making necessary adjustments will help ensure your items remain securely fastened and your walls stay intact.
In summary, using the right tools and materials, testing weight limits, locating studs, and periodically checking the walls are critical steps for safely and effectively hanging items on RV walls.
By following these tips and tricks, you can maximize the functionality and aesthetics of your RV living space without compromising safety or causing damage to your walls.
Check out our other helpful RV modification and decorating guides while you’re here: