
Kayaking is a popular activity with outdoor enthusiasts and is a great way to experience nature while you’re RVing. RV kayak racks can get pretty expensive, so knowing how to build a kayak rack for an RV is a great way to save money and get a customized kayak transporting solution for your rig.
We’ll walk through some different DIY RV kayak rack plans in today’s guide.
How To Build A Kayak Rack For An RV
There are different options you have when choosing how to build your RV kayak racks, and fortunately most of them are extremely affordable and don’t require much expertise.
You’ll need to decide whether you want a vertical RV kayak rack versus a horizontal RV kayak rack.
You’ll also need to decide whether you’ll be storing your kayaks on your RV roof or placing your kayak mount for RV behind the vehicle.
Take notice of what else you are carrying and where it’s placed on the exterior of your RV when choosing your DIY RV kayak rack plan below.
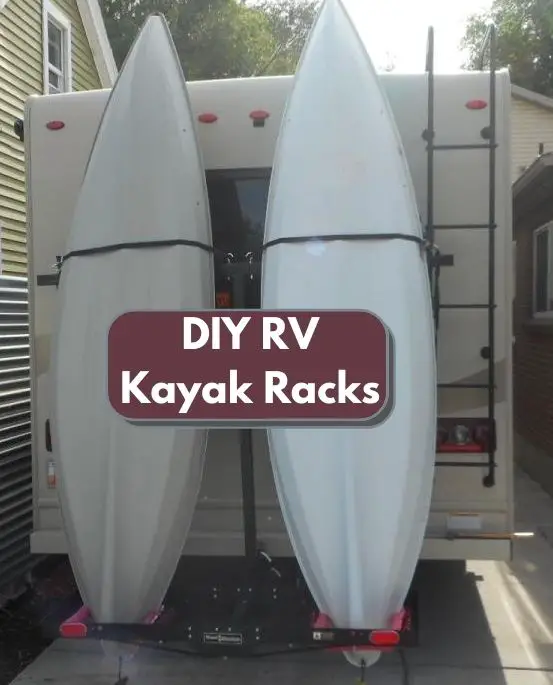
DIY Vertical RV Kayak Rack
The first and probably easiest DIY RV kayak rack plan is to use a pre-made cargo carrier or RV cargo rack that hooks into your tow hitch.
Here’s an example of a popular RV cargo rack you can use as the base of your RV kayak carrier:

- HEAVY-DUTY TRAILER HITCH STORAGE RACK : Clear out your trunk & move the bulky stuff on to this rear hitch cargo carrier . Our 60"x20"x6" steel cargo carrier hitch mount supports a massive 500 lbs., making it the go-to luggage carrier for camping coolers, firewood, or construction supplies. The 6" rails provide a secure perimeter to prevent items from sliding, while the corrosion-resistant finish helps your cargo basket survive every season. Haul more with the Mockins Hitch Mount Cargo Carrier .
- PRECISION-FIT 16 CU FT CAR HITCH CARGO CARRIER BAG : Forget generic vehicle soft-shell carriers that sag over the edges of cargo racks for trailer hitch hauling. Our 58"x20"x24" weatherproof cargo rack bag is tailor-made for this specific trailer hitch basket cargo carrier footprint. Crafted from abrasion-resistant vinyl with waterproof zippers & a rain flap, it creates a climate-controlled cargo hitch carrier vault for your luggage, shielding gear from highway road spray, rain, & winter salt.
- STREET-LEGAL TOW HITCH CARGO CARRIER SAFETY SUITE: Don't risk a ticket for an obscured plate. We’ve included an integrated cargo basket hitch license plate bracket & high-visibility reflectors to keep your vehicle DOT-compliant even when the trailer hitch rack cargo carrier is fully loaded. The 2" raised arm architecture provides extra ground clearance for cars & SUVs, while the foldable trailer rack shank lets you tilt the trailer hitch cargo rack up when the trip is over for easy parking.
- SILENT, ROCK-SOLID VEHICLE CARGO BASKETS : Eliminate the "clunk & sway" common with vehicle cargo carriers . This car luggage rack for hitch bundle features a hitch stabilizer & a hitch lock to create a rigid, rattle-free connection for this standard 2" receiver hitch cargo carrier . Combined with a 75"x40" expandable bungee net, 3 buckle straps, & 2 ratchet staps, your payload stays immobile even on winding roads. Always be secure with the Mockins Hitch Cargo Carrier for SUV , Car & Truck.
- A DECADE OF RELIABLE HAULING: We engineered a car rack cargo carrier for the long-term traveler. This folding hitch cargo carrier is backed by a 10-year limited warranty & supported by our US-based service team. Whether you’re heading to a weekend tailgate or moving across the country, the Mockins Hitch Mounted Cargo Carrier Car Luggage Rack delivers the structural integrity & technical support you need for a stress-free mission. Our folding cargo hitch carrier rack is built for the long haul.
Here’s how to build a DIY vertical RV kayak rack:
- Assemble the RV cargo rack per the manufacturer’s instructions.
- Install the RV cargo rack on your RV’s trailer hitch.
- Line the bottom of the cargo rack with padding such as foam or something soft to protect the end of your kayak.
- Stand the kayak up vertically in the kayak rack.
- Secure the kayak by bungee cords, ratchet straps, or rope to your RV’s ladder.
- You can store up to two kayaks using this DIY vertical RV kayak rack plan.
DIY RV Kayak Roof Rack
If you’d rather transport your kayaks on your roof, you can build a DIY RV kayak roof rack.
Building a rooftop RV kayak carrier is extremely simple- just line your RV’s existing roof rack rails with pool noodles and line the roof with as many pool noodles as you can get your hands on.
These foam noodles will protect your RV’s roof and your kayaks from damage during transport.
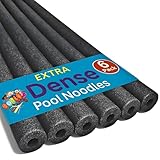
- 6 PACK OF BLACK OODLES OF NOODLES POOL NOODLES: Includes six extra-dense foam noodles, each measuring approximately 48” long × 2.5” in diameter with an approximately 1” hollow core. Lightweight, durable and flexible for versatile use at the pool, lake, beach, or in craft project.
- EXTRA-DENSE PROPRIETARY FOAM: Made with dense closed-cell structure, these pool noodles foam resist bending, water absorption, and surface damage. Firm, buoyant, and durable, they’re stiffer than standard pool noodles, ideal for water fitness or soft play equipment.
- MULTI-PURPOSE FOAM TUBES: Lightweight foam noodles for crafts, décor, swimming, floating, aquatic fitness, summer camps, obstacle courses, DIY insulation and protective padding. Smooth surface and flexible build make them unique pool toys adults can enjoy for activities, games, and themed events.
- MADE IN NORTH AMERICA: Manufactured with safe, non-toxic, closed-cell polyethylene foam, our swim noodles foam is free of harmful chemicals and built to meet safety standards. Ideal for swimming pool toys and recreational use.
- OFFICIAL OODLES OF NOODLES BRAND: Trusted by families, camps, and recreation centers for quality and reliability, our swimming noodles are made from premium pool noodle foam for a dense, supportive feel. Available in standard and jumbo pool noodles sizes for versatile recreational use, water activities, and creative projects.
Cut the foam noodles to size if needed, depending on if you are aligning them parallel or perpendicular to your roof or the kayaks.
Once done, set the kayaks on top and use ratchet straps to secure the kayaks to the roof of your RV.
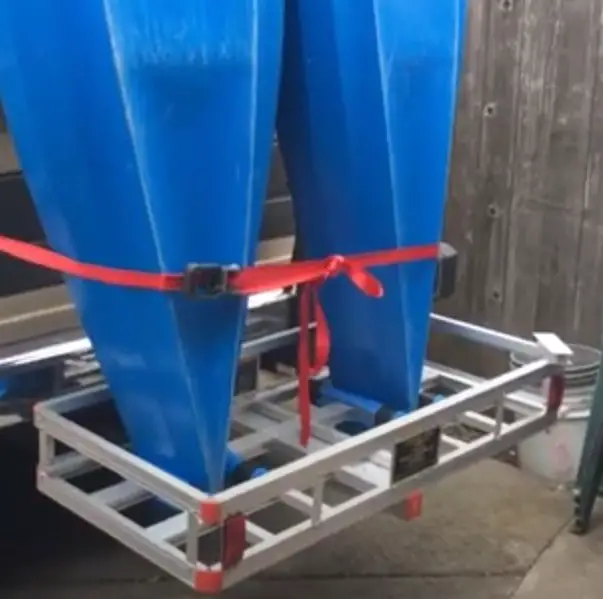
DIY Vertical RV Kayak Rack Under $200 (Option 2)
You can use a little creativity and cheap parts to make a very sturdy vertical RV kayak rack using supplies found at your local hardware store.
This vertical RV kayak rack plan uses a truck bed extender, a heavy duty luggage rack for a hitch mount, and a double decker receiver.
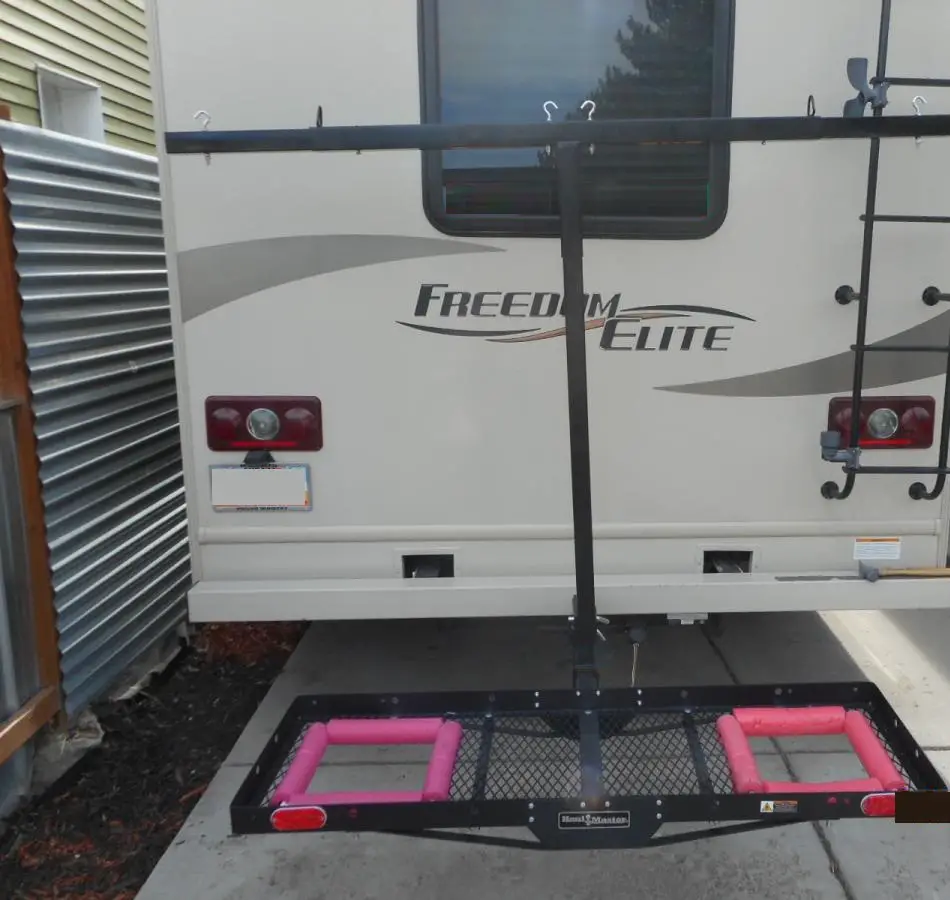
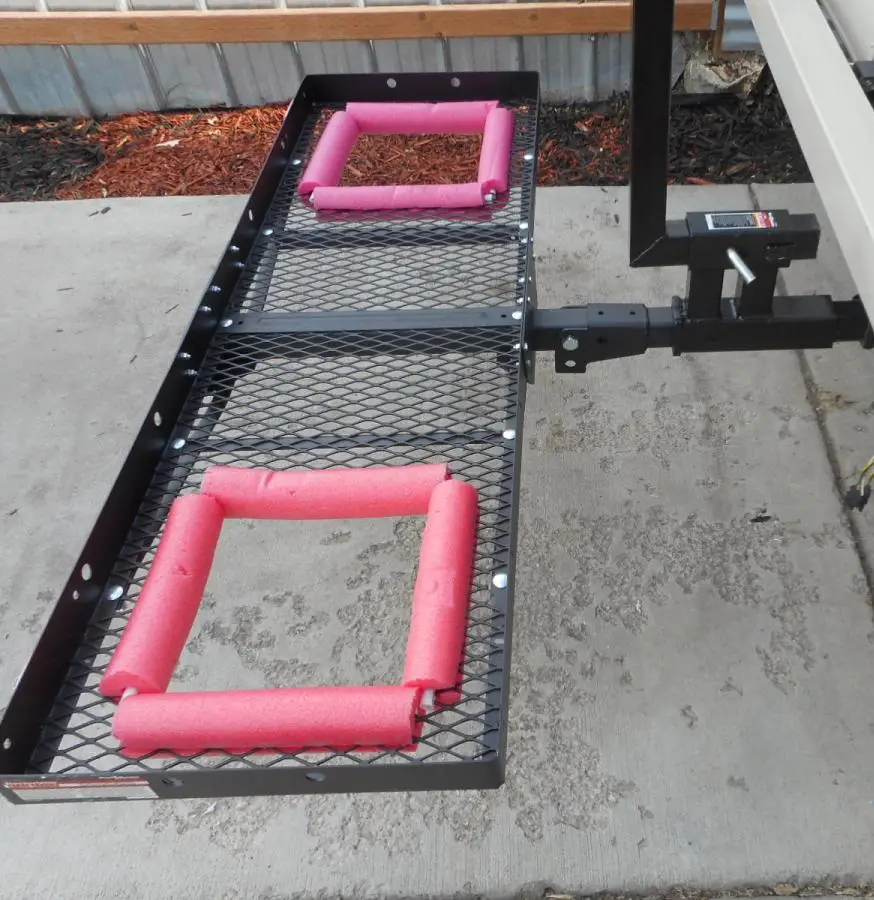
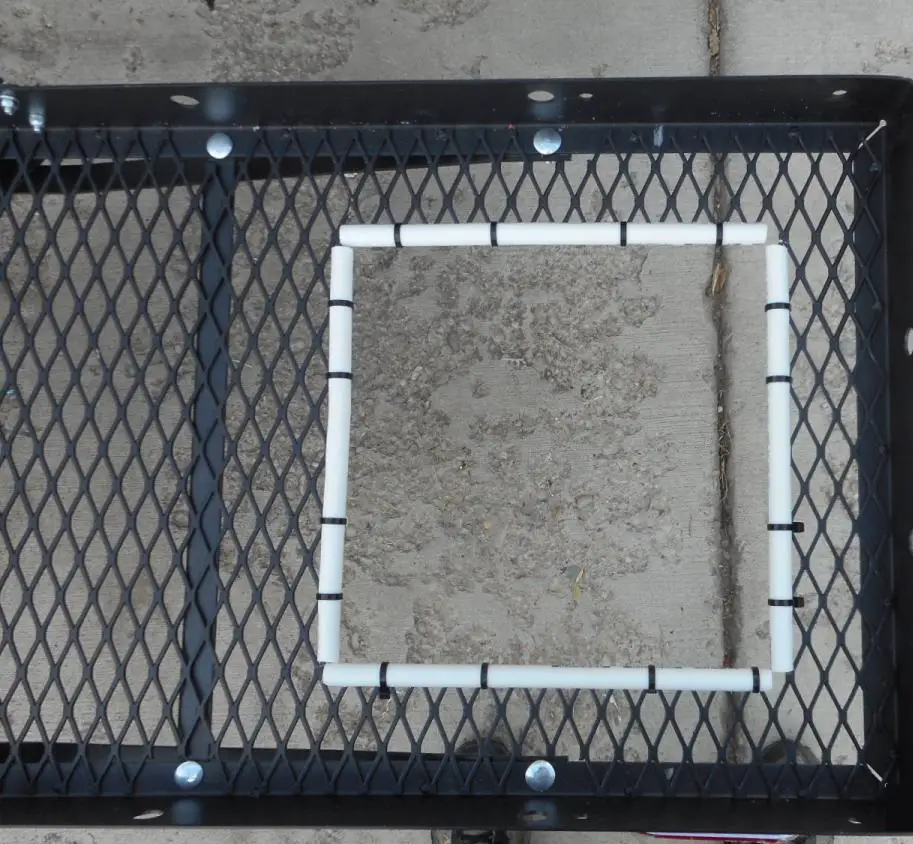
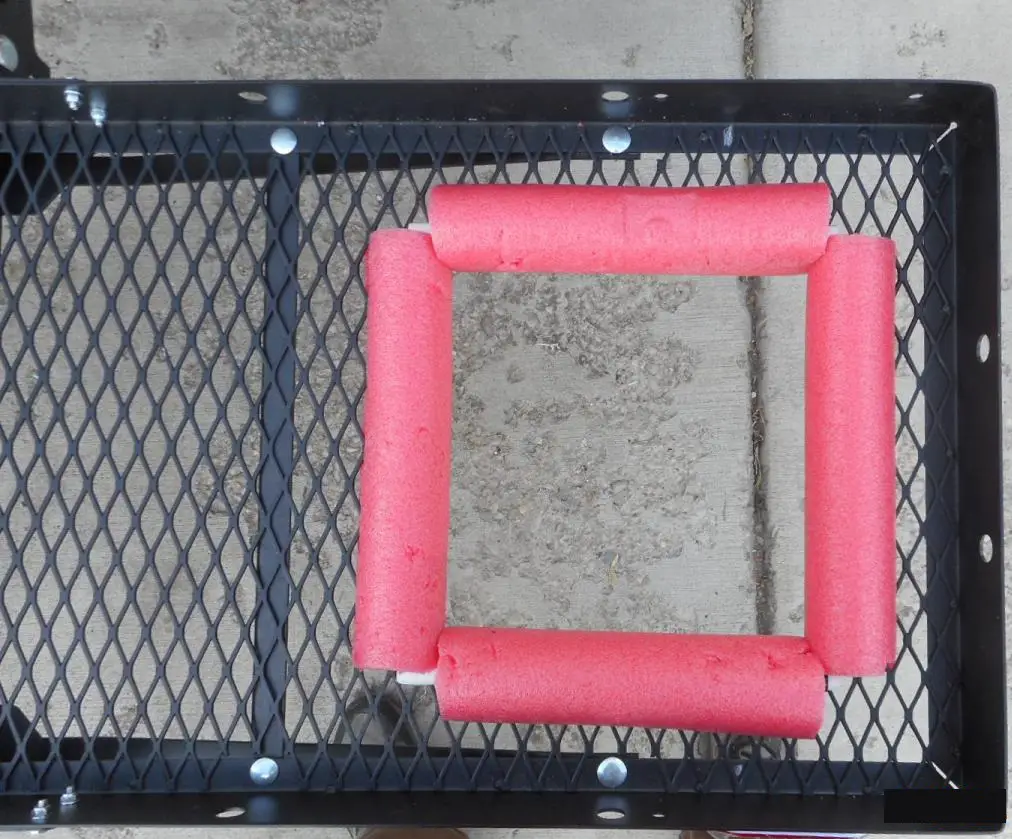
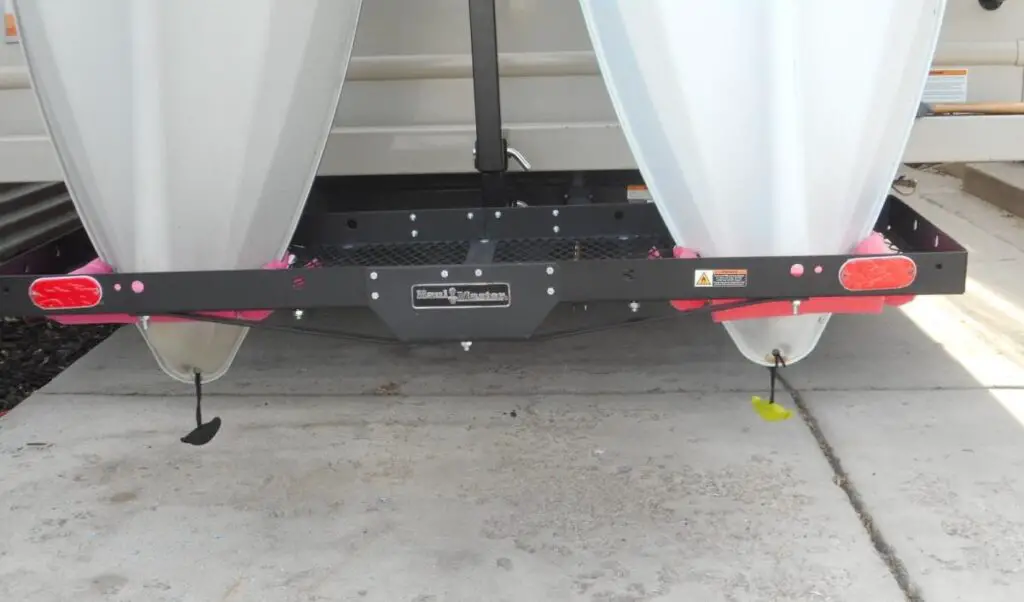
Cut square holes approximately 10” in size in the rack that your kayaks will sit in, then you can cut some pool noodles for each side and secure them to the rack with zip ties.
How To Build A Camper Kayak Rack
You can use the plans we outlined above when learning how to build a camper kayak rack.
Just make sure your camper has a tow hitch available or that you can install one so that your DIY camper kayak rack will work using the suggested materials.
Weld Your Own Custom DIY RV Kayak Rack
If you have some welding skills, you can really make a very nice and customized option.
Check out this video for someone who made a customized kayak and bike rack that mounts on to their trailer hitch for a fraction of the cost of a pre-made RV kayak rack:
How To Build A Kayak Rack For An RV: Wrapping Things Up
We hope this guide helped you learn more on how to build a kayak rack for your RV and saved you some money versus buying a premade RV kayak rack.
What plan did you go with, how did the process go, and were there any additional modifications you made?
Please share with us in the comments below!
While you’re here, check out our other great guides on RV mods:
- How to build DIY RV slide out storage trays
- Installing an RV bike rack over propane tanks
- The best RV outdoor kitchen mods
- RV gate ideas