
Mold is a common problem for RV owners, especially those who live in humid or damp areas. RV mold can cause serious health issues, such as respiratory problems, allergies, and skin irritation. It can also damage the structure of the RV and cause unpleasant odors. Therefore, it’s essential to know how to get rid of mold in a camper.
Getting rid of mold in a camper involves three steps: drying the camper out, cleaning and spot-treating any mold or stains, and removing the moisture source to prevent the mold from returning.
In this article, we will explore different ways to get rid of mold in a camper and prevent it from coming back.
How To Get Rid Of Mold In A Camper
Mold is a common problem in campers, especially in areas with high humidity levels. It can cause health problems and damage to the camper if not dealt with quickly. In this section, we will discuss the steps to get rid of mold in a camper.
Step 1: Dry It Out
The first step in getting rid of mold is to dry out the affected area. Mold thrives in moist environments, so it’s important to eliminate any sources of moisture. Open windows and doors to increase ventilation and use a dehumidifier to remove excess moisture from the air.
Step 2: Spot Treat Any Mold Or Stains
Once the affected area is dry, it’s time to spot treat any mold or stains. There are several ways to do this, depending on the severity of the problem.
There are a variety of solutions using household ingredients which we cover later in this guide. They range from bleach, rubbing alcohol, vinegar, baking soda, tea tree oil, hydrogen peroxide, and more.
You may need to use tougher solutions on stubborn spots.
Step 3: Repair Any Mold-Causing Problems
After spot treating the mold, it’s important to address any underlying issues that caused the mold to grow in the first place. This could include repairing leaks, improving ventilation, or addressing any other sources of moisture.
In conclusion, getting rid of mold in a camper requires a multi-step approach. It’s important to dry out the affected area, spot treat any mold or stains, and address any underlying issues that caused the mold to grow. By following these steps, you can eliminate mold from your camper and prevent it from returning.
Identifying Mold in Your RV
If you are experiencing any health issues or notice a powdery substance, colors, or an earthy smell in your RV, it may be time to check for mold. Identifying mold in your RV is essential to keep yourself and your family safe and healthy. Here are some methods to identify mold in your RV:
Use The Sniff Test
The easiest way to detect mold is by using your nose. Mold has a distinct earthy, musty smell. If you notice a strong odor in your RV, it is an indication that mold is present. Make sure to check all areas of your RV, including the bathroom, kitchen, and closets.
Try A Toxic Mold Test Kit
If you are unsure whether mold is present in your RV, you can use a toxic mold test kit. These kits can detect the presence of mold in the air and surfaces. They are easy to use and provide accurate results. If the test kit detects mold, it is recommended to seek professional help to remove it.
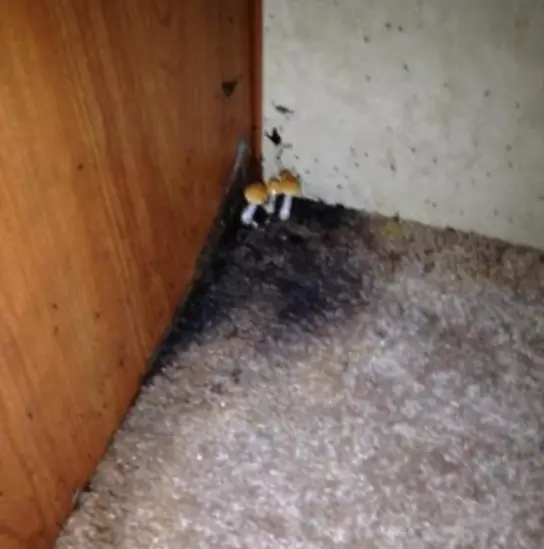
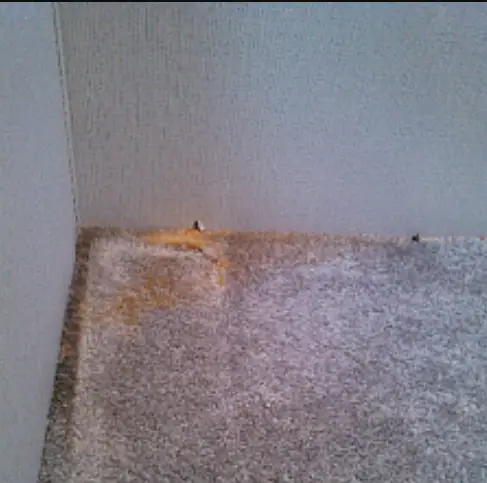
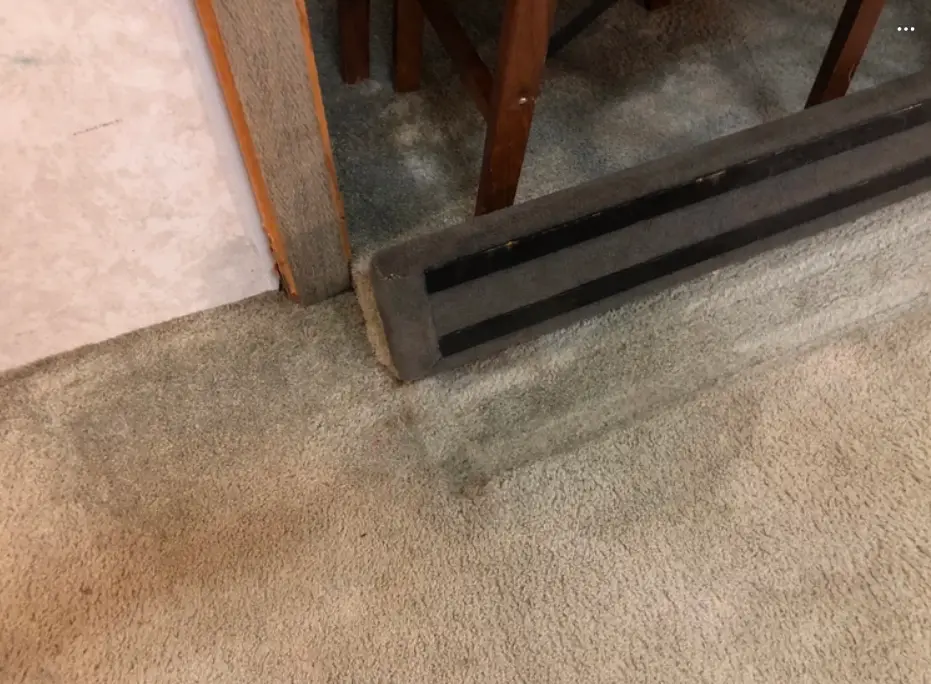
Visually Inspect Your RV For Mold
Another way to identify mold in your RV is by visually inspecting it. Look for any discoloration or stains on the walls, ceilings, and floors. Mold can appear in different colors, including black, blue, green, or white. Check all areas of your RV, including the corners and hidden spaces.
It is important to note that mold can cause health issues, including respiratory problems, headaches, and allergies. Therefore, it’s crucial to identify and remove mold from your RV as soon as possible.
In the next section, we will discuss how to remove mold from your RV.
What To Use To Kill RV Mold
When it comes to getting rid of mold in your RV, there are several options available. Here are some of the most effective methods for killing mold:
Rubbing Alcohol and Water
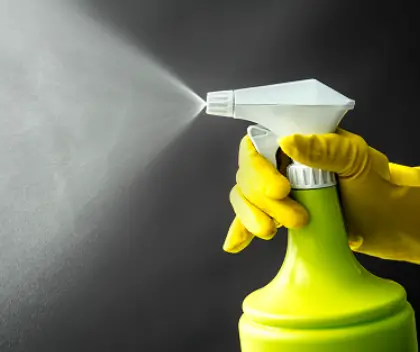
A mixture of rubbing alcohol and water can be an effective way to kill mold. Simply mix equal parts of rubbing alcohol and water in a spray bottle and apply to the affected area. Allow the solution to sit for a few minutes before wiping clean with a damp cloth.
Bleach and Water
Bleach is a powerful disinfectant that can kill mold spores. Mix one cup of bleach with one gallon of water and apply to the affected area. Allow the solution to sit for 15 minutes before rinsing with water.
Undiluted White Vinegar
Undiluted white vinegar is a natural and effective way to kill mold. Simply spray the vinegar directly onto the affected area and let it sit for an hour before wiping clean with a damp cloth.
3% Hydrogen Peroxide
3% hydrogen peroxide can be used to kill mold on non-porous surfaces. Simply spray the hydrogen peroxide onto the affected area and let it sit for 10 minutes before wiping clean with a damp cloth.
Baking Soda and Water
Baking soda is a natural cleaner that can be used to kill mold. Mix one-quarter tablespoon of baking soda with one cup of water and apply to the affected area. Allow the solution to sit for 10-15 minutes before wiping clean with a damp cloth.
Distilled Ethanol
Distilled ethanol is a powerful disinfectant that can kill mold. Simply spray the ethanol onto the affected area and let it sit for a few minutes before wiping clean with a damp cloth.
Tea Tree Oil
Tea tree oil is a natural antifungal that can be used to kill mold. Mix one teaspoon of tea tree oil with one cup of water and apply to the affected area. Allow the solution to sit for a few minutes before wiping clean.
Grapefruit Seed Extract
Grapefruit seed extract is a natural disinfectant that can be used to kill mold. Mix 20 drops of grapefruit seed extract with two cups of water and apply to the affected area. Allow the solution to sit for a at least 10 minutes before attempting to wipe it up.
Commercial Mold Remediation Products
There are several commercial mold remediation products available that can be used to kill mold. These products typically contain bleach or other disinfectants and should be used according to the manufacturer’s instructions.
Overall, it’s important to choose a method that is safe for your RV’s surfaces and effective at killing mold. Always wear protective gear such as gloves and a mask when working with mold, and be sure to properly ventilate the area to prevent inhaling mold spores.
Common Areas for Mold Growth
Mold can grow anywhere in your camper, but there are certain areas that are more prone to mold growth than others. Here are some common areas to keep an eye on:
- Windows: Condensation can build up on windows, providing a moist environment for mold to grow. Make sure to wipe down windows regularly and keep them open for ventilation when possible.
- Walls: Moisture can seep into walls from leaks or high humidity levels, creating a perfect environment for mold growth. Check for any signs of discoloration or musty odors on walls.
- Doors: Similar to windows, doors can also accumulate condensation and provide a moist environment for mold growth. Keep doors open for ventilation and wipe down any moisture regularly.
- Cabinets: If cabinets are located near damp areas, such as sinks or showers, they can easily become a breeding ground for mold. Check inside cabinets for any signs of mold growth.
- Floors: Carpets and other types of flooring can trap moisture and provide an ideal environment for mold growth. Make sure to clean up any spills or leaks immediately and consider using a dehumidifier to reduce humidity levels.
- Damp Areas: Any area that is consistently damp, such as bathrooms or kitchens, is at risk for mold growth. Make sure to keep these areas well-ventilated and dry.
- RV Roof: The roof of your camper can also be a common area for mold growth, especially if there are any leaks or damage. Regularly inspect and maintain your RV roof to prevent any moisture from seeping in by using a sealant such as Flex Seal or doing a full RV roof reseal.
See Related: How To Fix RV Rotted Wood Roof
- Rubber Roof: If your camper has a rubber roof, it is important to regularly clean and maintain it to prevent mold growth. Use a mild detergent and soft brush to clean the roof and check for any signs of damage.
By regularly inspecting and maintaining these common areas, you can prevent mold growth in your camper and ensure a healthy and safe living environment.
Causes of Mold in Campers
Mold is a common problem for campers, and it can cause serious health issues if left untreated. Understanding the causes of mold in campers can help you prevent it from forming in the first place.
The primary cause of mold in campers is moisture. When there is excess moisture in the air, it can lead to the growth of mold and mildew. This can be caused by a variety of factors, including leaks, water damage, and condensation.
Leaky roofs are a common culprit of moisture buildup in campers. If the roof is not properly maintained, water can seep in and cause damage to the interior of the camper. This can lead to the growth of mold and mildew, especially in areas that are not well-ventilated.
Humidity is another factor that can contribute to mold growth in campers. When the air is humid, it can create the perfect environment for mold to thrive. This is especially true in areas that are not well-ventilated, such as bathrooms and kitchens.
Condensation is also a major cause of mold in campers. When warm air meets a cold surface, it can cause moisture to form. This can lead to the growth of mold and mildew, especially in areas that are not well-ventilated.
Water damage is another factor that can contribute to mold growth in campers. If there is a leak or other type of water damage, it can create the perfect environment for mold to thrive. This is especially true in areas that are not well-ventilated, such as closets and storage areas.
In summary, the main causes of mold in campers are moisture, leaks, humidity, condensation, water damage, and roof leaks. By understanding these causes, you can take steps to prevent mold from forming in your camper.
Preventing Future Mold Growth
Mold can be prevented by taking some simple steps to control moisture levels in your camper or RV. Here are some tips to help you keep your camper mold-free:
Use Moisture Absorbers In Your Camper or RV
Moisture absorbers, such as silica gel packets or activated charcoal, can be placed in your camper to help absorb excess moisture in the air. These can be purchased at most camping or hardware stores and are an easy and inexpensive way to prevent mold growth.
Regular Cleaning Is Your Friend
Regular cleaning of your camper or RV can help prevent mold growth. Make sure to wipe down any surfaces that may be prone to moisture, such as windows, walls, and floors. Pay special attention to areas that may be difficult to reach, such as corners and crevices.
Keep The Air Flowing
Proper ventilation is key to preventing mold growth in your camper or RV. Open windows and doors to let fresh air in, and use exhaust fans or vents when cooking or showering to help remove excess moisture from the air.
Try A Dehumidifier In Your Camper
An RV dehumidifier can be a great investment to help control moisture levels in your camper or RV. These can be purchased at most camping or hardware stores and can be especially useful in areas with high humidity levels.
Fix Any Sources Of Leaks
If you notice any leaks in your camper or RV, it is important to fix them as soon as possible. Leaks can lead to excess moisture in the air, which can promote mold growth.
Waterproof Your RV or Camper
Make sure your camper or RV is properly waterproofed to prevent water from entering and causing moisture buildup. This can be done by applying a waterproof sealant to any areas that may be prone to leaks, such as windows, doors, and seams.
By following these tips, you can help prevent future mold growth in your camper or RV. Remember to keep moisture levels under control and to fix any leaks or sources of excess moisture as soon as possible.
See Related: How To Prevent RV Mold During Storage
Dealing with Severe Mold Infestation
When dealing with a severe mold infestation in a camper, it is important to take immediate action. In some cases, it may be necessary to seek professional mold remediation services to ensure that the mold is completely removed and does not return.
If the mold covers a large area or has penetrated deep into the camper’s surfaces, it may be necessary to remove and replace affected materials. This can include drywall, insulation, and even flooring. It is important to wear proper protective gear, such as gloves, goggles, and a respirator, when removing moldy materials to avoid inhaling spores or coming into contact with the mold.
In addition to removing moldy materials, it is important to address the underlying cause of the mold growth. This could be a leaky roof, plumbing issues, or high humidity levels. Without addressing the root cause, the mold is likely to return even after remediation.
If seeking professional mold remediation services, it is important to choose a reputable company with experience in dealing with mold in campers. Look for companies that are certified by organizations such as the Institute of Inspection, Cleaning and Restoration Certification (IICRC) or the National Organization of Remediators and Mold Inspectors (NORMI).