
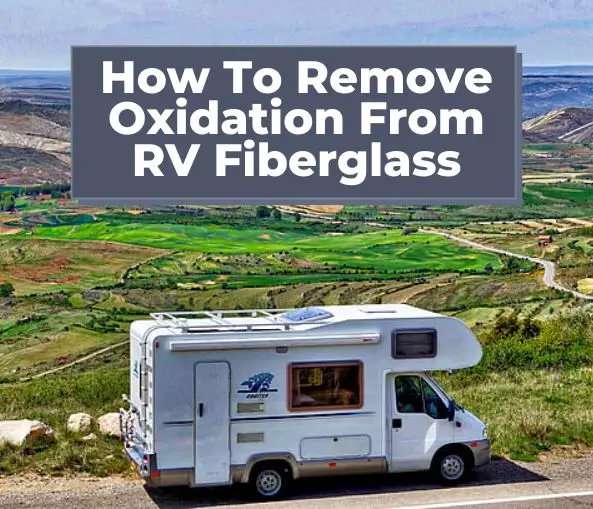
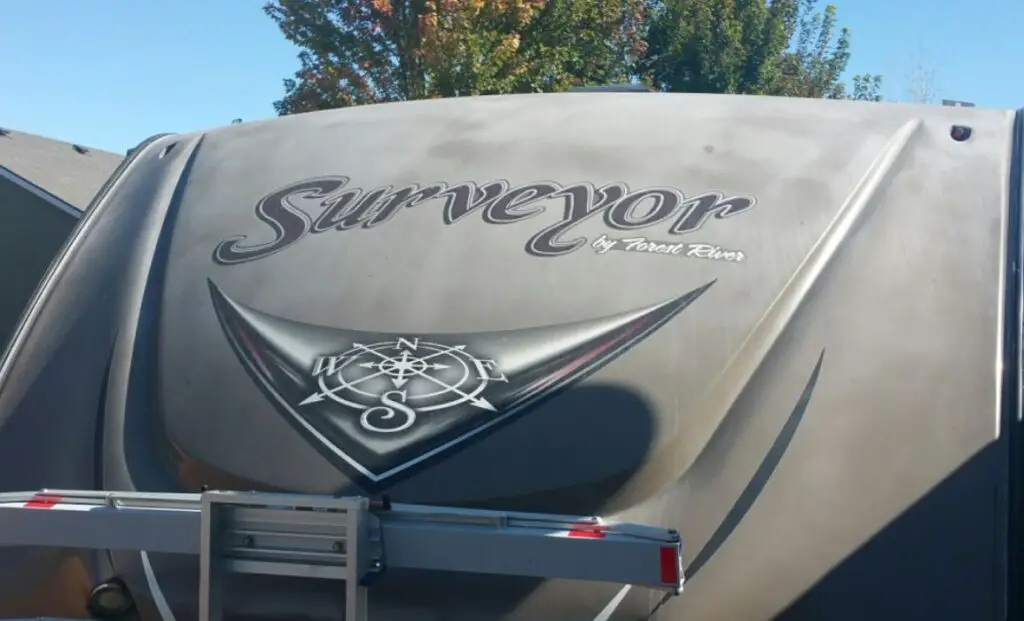
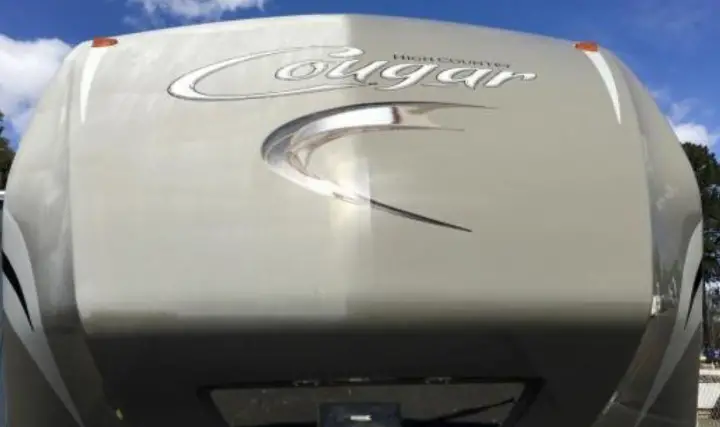
As an RV owner, it’s crucial to maintain its condition, including knowing how to remove oxidation from RV fiberglass. Oxidation on the fiberglass exterior is a common issue caused by the sun’s UV rays breaking down the gelcoat, resulting in a chalky, faded or yellowed appearance. This not only looks unappealing but can also decrease your RV’s value.
There are several methods of how to get the oxidation off of your RV’s exterior, ranging from hand buffing to using power tools or wet sanding. With some effort and the right tools, you can restore your RV’s exterior and prevent further damage.
In this article, we’ll cover some effective ways to remove oxidation from RV fiberglass. We provide step-by-step instructions and tips for both experienced and new RV owners. With our guidance, you can keep your RV in top shape and travel with confidence.
Gather Materials
The first step in removing oxidation from your RV’s fiberglass is to gather all the necessary materials. Here are some of the items you will need:
- Microfiber rags
- Fiberglass polish
- Buffer or power tool
- Polishing pad
- Activated polish
- Wet sandpaper
- Non-scratch kitchen sponge
- Clean rag
- Masking materials (plastic sheeting and painter’s tape)
Before you start, make sure you have all the materials you need to avoid any delays or interruptions. You can purchase most of these items at your local RV supply store or online. Make sure to read the labels carefully and follow the instructions on how to use each item.
It’s also important to wear gloves and protective eyewear when handling any chemicals or tools. This will protect your hands and eyes from any potential harm.
Prepare the RV
Before you start to remove oxidation from your RV fiberglass, you need to prepare it properly. Here are the steps you need to follow:
- Clean the RV: Start by washing your RV thoroughly with soap and water. Make sure you remove all the dirt, grime, and debris from the surface. Rinse it off with water and let it dry completely before moving on to the next step.
- Protect the surrounding areas: Cover any parts of the RV that you don’t want to get damaged during the oxidation removal process. Use painter’s tape, plastic sheeting, or any other suitable material to cover the windows, doors, and other parts of the RV that you want to protect.
- Gather the necessary tools and materials: Make sure you have all the tools and materials you need to remove oxidation from your RV’s fiberglass. Depending on the method you choose, you may need a polishing compound, a power tool, sandpaper, and other materials. Read the instructions carefully and gather all the necessary tools and materials before you start.
By following these steps, you can ensure that your RV is properly prepared for the oxidation removal process. This will help you achieve better results and avoid damaging your RV’s fiberglass.
Section 4: Choose a Cleaning Solution
Commercial Cleaning Solution
There are numerous commercial cleaning solutions available for removing oxidation from RV fiberglass. These solutions are designed to eliminate oxidation and restore the fiberglass’s shine, making them easy to use and time-saving.
Before buying a commercial cleaning solution, it’s important to read the label to ensure it’s safe for use on fiberglass. Some solutions may contain harsh chemicals that can damage the fiberglass or harm the environment. It’s best to choose an eco-friendly cleaning solution that is safe for use on fiberglass.
Here are some popular commercial cleaning solutions for removing oxidation from RV fiberglass:
| RV Oxidation Removal Product | Description |
| 3M Marine Restorer and Wax | One step solution that removes stains, oxidation, and scratches, while restoring the RV fiberglass shine. |
| Star Brite Premium Cleaner Wax | A cleaner and wax in one that shines fiberglass and removes oxidation. |
| Collinite Fiberglass Boat Cleaner | Cleans, protects, and restores RV fiberglass while removing oxidation. |
DIY RV Oxidation Cleaning Solution
If you prefer a more natural and cost-effective solution, you can make your own cleaning solution to remove oxidation from RV fiberglass. Here is a simple recipe that you can try:
- Mix equal parts of white vinegar and water in a spray bottle.
- Spray the solution onto the fiberglass surface and let it sit for 10-15 minutes.
- Scrub the affected area with a soft-bristled brush or sponge.
- Rinse the cleaned section with water and dry it with a clean towel.
This DIY solution is effective in removing minor oxidation from fiberglass surfaces. However, for severe cases of oxidation, you may need to use a commercial cleaning solution or seek professional help.
Apply the Cleaning Solution
Now that you have prepared the surface of your RV fiberglass, it’s time to apply the cleaning solution. There are different types of solutions that you can use, such as vinegar, fiberglass restorer, or high-grade super duty polishing compound. Choose the one that works best for you and follow the manufacturer’s instructions.
If you are using vinegar, mix equal parts of vinegar and water in a spray bottle. Spray the solution on the surface of the fiberglass and let it sit for a few minutes. Then, scrub the surface with a soft-bristled brush or a sponge. Rinse the surface with water and dry it with a clean towel.
If you are using a fiberglass restorer, apply a small amount of the product to a non-scratch kitchen sponge. Buff the RV by hand, applying gentle pressure. Wipe off the product with a clean rag. Repeat the process until you have covered the entire surface of the fiberglass.
When using a high-grade super duty polishing compound, apply it with an electric buffer or soft cloth. Work in small sections and apply gentle pressure. Remove excess product with a clean rag and repeat until the entire fiberglass surface is covered. For extra shine, place a microfiber cloth over the power buffer and go over the area one last time. The results will impress you!
Check out this quick video tutorial showing how effective using a power buffer on RV fiberglass can be:
Remember to wear gloves and protective eyewear when working with cleaning solutions. Also, make sure to work in a well-ventilated area to avoid inhaling fumes.
Rinse the RV
After sanding your RV fiberglass with a wet sandpaper and applying an oxidation remover, it’s time to rinse the RV. Rinsing the RV is a crucial step in the process of removing oxidation from the fiberglass. Here are some tips on how to properly rinse your RV:
- Use a garden hose or pressure washer to rinse the RV. Be sure to use a low-pressure setting to avoid damaging the fiberglass.
- Rinse the RV from top to bottom to ensure that all the oxidation remover and debris are washed away.
- Pay attention to the corners and crevices of the RV, as oxidation and debris can accumulate in these areas.
- Use a microfiber towel or chamois to dry the RV after rinsing it. This will prevent water spots from forming on the fiberglass.
It’s important to note that you should never let the oxidation remover dry on the RV fiberglass. This can cause damage to the fiberglass and make it more difficult to remove the oxidation. Always rinse the RV thoroughly and dry it immediately after applying the oxidation remover.
By following these simple steps, you can effectively remove oxidation from your RV fiberglass and restore its shine. Remember to take your time and be patient, as removing oxidation can be a time-consuming process. With a little effort, you can have your RV looking like new again.
Dry the RV
After you have rinsed the RV thoroughly, it’s time to dry it. Leaving water droplets on the surface can cause water spots, which can be difficult to remove. Here are a few tips to dry your RV:
- Use a microfiber towel or chamois to dry the RV. These materials are gentle on the surface and absorb water well.
- Start at the top of the cleaned area and work your way down to the bottom. This will prevent water from running down onto the areas you have already dried.
- Dry the windows and mirrors with a separate towel to prevent streaks.
- Open all the doors and compartments to allow air to circulate and dry any hidden areas.
It’s important to make sure that the RV is completely dry before moving on to the next step. If you’re in a hurry, you can use a leaf blower or a compressed air gun to blow the water off the surface. However, be careful not to scratch the surface with the air stream.
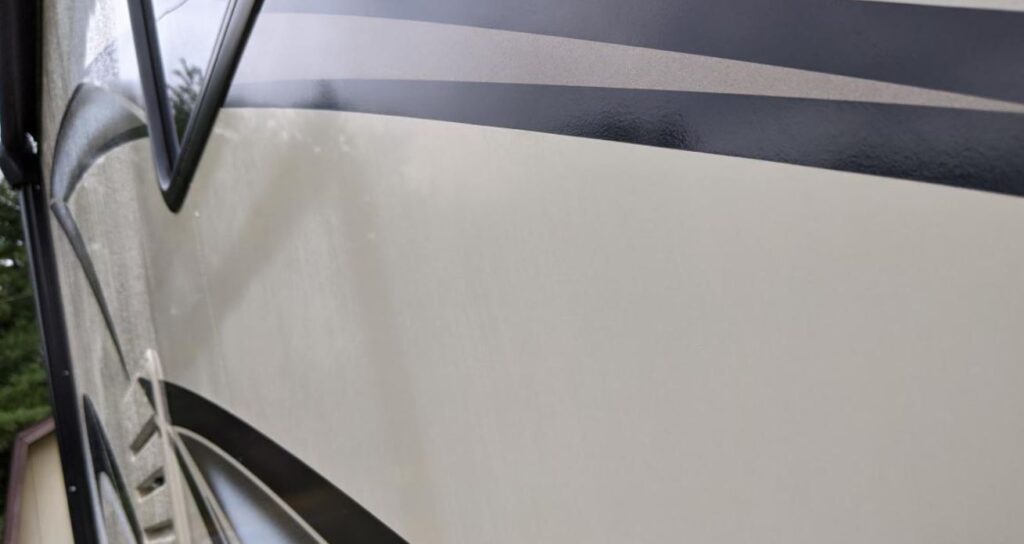
Once the RV is dry, you can move on to the next step, which is waxing and polishing. This step will protect the surface from future oxidation and keep it looking shiny and new.
Apply Wax
After you have removed the oxidation from your RV’s fiberglass, it’s important to protect the surface from future damage. Applying a coat of wax can help prevent oxidation and other forms of damage caused by exposure to the elements.
Here are a few steps to follow when applying wax to your RV’s fiberglass:
- Clean the surface with soap and water to remove any dirt or debris.
- Dry the surface completely with a clean towel.
- Apply a small amount of wax to a clean, dry cloth.
- Using circular motions, apply the wax to the surface of the fiberglass.
- Allow the wax to dry completely.
- Buff the surface with a clean, dry cloth to remove any excess wax.
It’s important to choose a wax that is specifically designed for use on fiberglass surfaces. Look for a product that provides UV protection and is easy to apply and remove.
By regularly applying wax to your RV’s fiberglass, you can help protect the surface from damage and keep it looking great for years to come.
How To Prevent RV Oxidation
Now that you’ve removed the RV fiberglass oxidation, here are a few tips on how to keep it from happening again:
- Wash your RV regularly. This will help remove dirt, grime, and other pollutants that can cause oxidation. Use a mild soap like Dawn, and avoid using abrasive cleaners or harsh chemicals.
- Wax and polish your RV regularly. Wax protects the fiberglass from damage like oxidation. Use a marine or RV-specific wax and apply it according to the instructions on the package.
- Cover your RV while in storage. Covering your RV will help protect it from harmful UV rays, which are what causes oxidation. If you don’t have a covered or shaded spot to park your RV, you can use tarps or RV covers.
By following these tips, you can help prevent RV fiberglass oxidation and keep your RV looking its best for years to come.
Check out our other guides on RV maintenance and repair while you’re here to keep your rig in tip-top shape: