
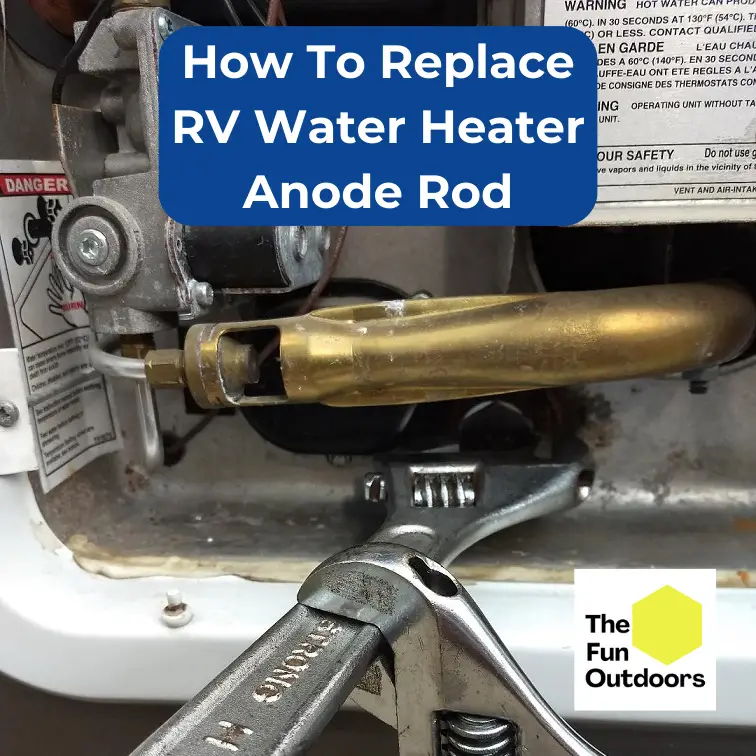
Replacing the RV water heater anode rod is an essential part of maintaining the water heater’s functionality. The anode rod is a metal component that prevents the water heater from corroding. Over time, the anode rod will deteriorate, and if not replaced, the water heater’s tank will corrode, leading to costly repairs or replacement. So any RV owner needs to know how to replace a RV water heater anode rod.
To replace the RV water heater anode rod, you’ll need to shut off power and water to your RV water heater, empty the water heater, remove the old anode rod, install the new anode rod, refill your tank with water, then turn the water heater’s electricity and water supplies back on.
Key Takeaways:
- Anode rods in RV water heaters need to be replaced periodically to prevent corrosion and extend the life of the water heater.
- The first step is to turn off the propane or electric power supply to the water heater and let it cool down, then drain the water heater.
- You will need a 1-1/16″ socket wrench or a socket that fits the drain plug to remove the old anode rod.
- Make sure to purchase a replacement anode rod that is compatible with your specific model of RV water heater. You can find these online or at a local RV supply store.
- Apply Teflon pipe thread tape to the threads of the new anode rod before installing it.
- Once the new anode rod is in place, turn the power and water supply back on, refill the water heater, and check for any leaks.
- It is recommended to replace the anode rod every 1-2 years, depending on usage and water quality.
Why Do I Need To Replace The RV Water Heater Anode Rod?
The RV water heater anode rod is a crucial component that plays a significant role in protecting the water heater tank from corrosion. Over time, the anode rod will eventually corrode and deteriorate, requiring replacement. In this section, we will explore the reasons why RV owners need to replace their water heater anode rod.
Identifying the Need for Replacement
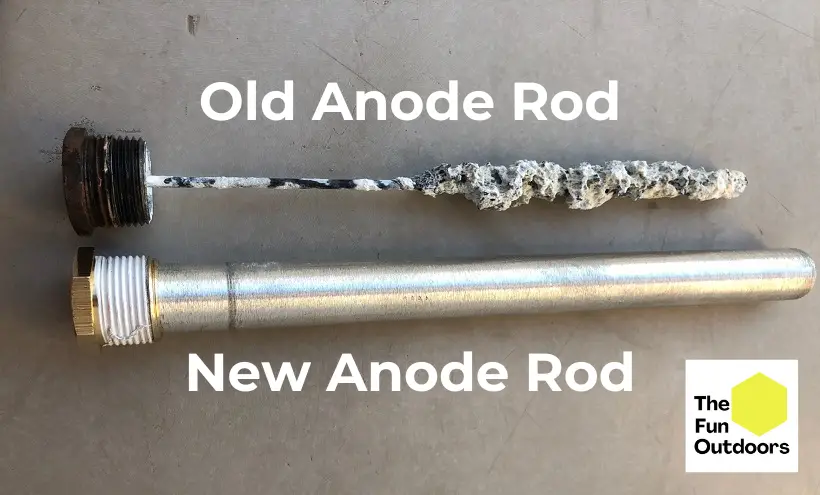
The anode rod is a sacrificial metal component that is installed in the RV water heater tank. Its primary function is to attract and absorb corrosive elements that would otherwise damage the tank walls. As the anode rod attracts these corrosive elements, it will eventually corrode and wear out, and its effectiveness will diminish.
When the anode rod is depleted, the corrosive elements will start attacking the tank walls, leading to rust and corrosion. If left unchecked, the corrosion can cause leaks and even ruptures in the water heater tank, leading to costly repairs or even replacement of the entire unit.
One of the best ways to identify the need for anode rod replacement is to inspect it regularly. RV owners should inspect the anode rod at least once every six months or after every camping season. The inspection should involve checking the rod’s condition, including its length, thickness, and appearance.
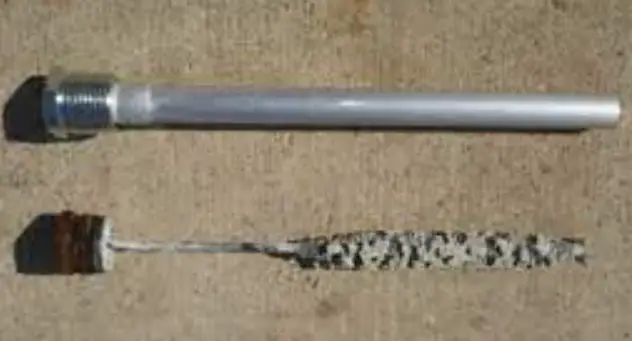
If the anode rod is less than 50% of its original size or has significant corrosion, it is time to replace it. RV owners should also replace the anode rod if it is more than a year old, even if it appears to be in good condition.
RV water heater anode rod replacement should be done every 1 to 2 years.
Step-by-Step Replacement Process
Replacing an RV water heater anode rod is a straightforward process that can be completed in a few simple steps. Here is a step-by-step guide to help you replace the anode rod in your RV water heater:
Step 1: Gather All Necessary Tools
Before starting the replacement process, gather all the necessary tools and equipment. You will need a socket wrench, pliers, Teflon tape, a new anode rod, and a bucket.
Step 2: Shut Off the Water Supply To The RV Water Heater
Turn off the water supply to the RV water heater. Locate the water supply valve and turn it off. This will prevent water from flowing into the water heater during the replacement process.
Step 3: Cut Off Propane And/Or Electricity To The Water Heater
Next, cut off the propane and/or electricity supply to the water heater. This will ensure that the water heater is not powered during the replacement process.
Step 4: Empty The RV Water Heater
Open the pressure relief valve and remove the drain plug to empty the RV water heater. Allow the water to drain completely before moving on to the next step.
Step 5: Remove RV Water Heater Anode Rod
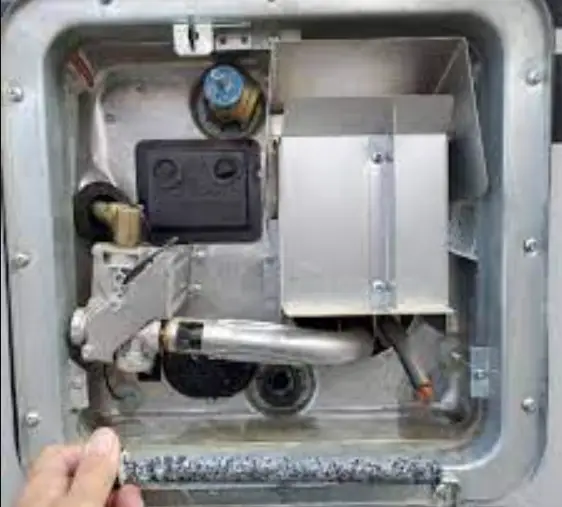
Locate the anode rod by opening the access panel on the outside of the RV. Using a socket wrench, unscrew the hexagonal bolt to remove the anode rod.
Step 6: Install New RV Water Heater Anode Rod
Insert the new anode rod into the water heater and tighten it using a socket wrench. Apply Teflon tape to the threads of the anode rod before screwing it in to prevent leaks.
Step 7: Refill The RV Water Heater
Close the pressure relief valve and replace the drain plug. Refill the RV water heater with fresh water. Be sure to check the manufacturer’s instructions for the correct water level.
Step 8: Restore Water and Power To The Water Heater
Turn on the water supply to the RV water heater. Once the water is flowing, turn on the propane and/or electricity supply to the water heater.
Step 9: Ensure Normal Operation And Check For Leaks
Check the water heater for any leaks and ensure that it is operating normally. Once you have confirmed that the water heater is working correctly, you have successfully replaced the anode rod.
Replacing the anode rod in your RV water heater is an essential maintenance task that should be done regularly to extend the life of your water heater. By following these simple steps, you can easily replace the anode rod and ensure that your water heater is working correctly.
How Often Do I Need To Change An RV Water Heater Anode Rod?
The anode rod in an RV water heater is a crucial component that protects the tank from corrosion. As a result, it is essential to keep it in good condition to ensure the longevity of the water heater. But how often should you replace the anode rod?
According to experts, the frequency of replacement depends on several factors, including the type of water you use, the frequency of use, and the quality of the anode rod. As a general rule, it is recommended to inspect the anode rod at least twice a year and replace it when it is 75% corroded or dissolved.
If you use hard water, which contains high levels of minerals, you may need to replace the anode rod more frequently, possibly every three to six months. On the other hand, if you use soft water, which has low mineral content, you may only need to replace the anode rod every two to three years.
It is also important to note that if you frequently use the RV water heater, for example, if you are a full-time RVer, you may need to replace the anode rod more often. Additionally, if you notice any signs of corrosion or rust on the anode rod during your inspections, you should replace it immediately to prevent damage to the water heater tank.
Types of Anode Rods
When it comes to replacing an RV water heater anode rod, there are three main types to choose from: magnesium, aluminum, and zinc. Each type has its own benefits and drawbacks, and choosing the right one for your RV water heater can help extend the life of your water heater and prevent corrosion.
Magnesium Anode Rod
Magnesium anode rods are the most commonly used type of anode rod for RV water heaters, and are good for soft water. They are highly effective at preventing corrosion and are generally the most affordable option. However, they tend to corrode more quickly than other types of anode rods, which means they need to be replaced more frequently.
Aluminum Anode Rod
Aluminum anode rods are a good choice for RV owners who are concerned about the environment. They are made from recycled aluminum and are therefore more eco-friendly than other types of anode rods. They also tend to last longer than magnesium anode rods, which means they don’t need to be replaced as frequently. However, they are generally more expensive than magnesium anode rods.
Zinc Anode Rod
Zinc anode rods are a good choice for RV owners who have hard water. They are highly effective at preventing corrosion caused by hard water, but they tend to be less effective at preventing other types of corrosion. They also tend to be more expensive than magnesium anode rods.
Regardless of which type of anode rod you choose, it’s important to make sure that it is the correct size for your RV water heater. Most RV water heate anode rods are a standard size, but it’s always a good idea to double-check before making a purchase.
Choosing the Right Anode Rod

When it comes to choosing the right anode rod for your RV water heater, there are a few things to consider. Anode rods are made of different materials, and not all of them are suitable for every type of water.
One of the most common materials used for anode rods is magnesium. This type of anode rod is ideal for areas with soft water. Soft water is water that has low mineral content, and it is less likely to cause corrosion in your RV’s water heater. If you live in an area with hard water, which has high mineral content, a magnesium anode rod may not be the best choice for you.
Another important factor to consider when choosing an anode rod is the manufacturer. It’s always a good idea to choose an anode rod from a reputable manufacturer, as this will ensure that you get a high-quality product that will last for a long time. Some popular manufacturers of anode rods for RV water heaters include Camco, Suburban, and Atwood.
If you’re not sure which anode rod to choose, you can always ask your RV dealer for advice. They will be able to recommend an anode rod that is suitable for your RV and the type of water in your area. You can also find anode rods at camping stores like Camping World and Gander Mountain, as well as home improvement stores like Home Depot and Lowe’s.
Are All RV Anode Rods The Same Size?
When it comes to RV anode rods, one common question that RV owners have is whether all anode rods are the same size. All RV anode rods are not the same size. While most anode rods come in a standard size, there are some exceptions.
Generally, most RV anode rods are 9.25 inches long and use 3/4 inch threads. This is the standard size for most RV anode rods, and you can use the same size socket that will fit all RV anode rods. However, it is important to note that not all water heaters in RVs are the same, and some may require a different size anode rod.
To determine the size of the anode rod needed for your RV’s water heater, it is recommended to consult the owner’s manual or contact the manufacturer. They can provide you with the specific size and type of anode rod required for your RV’s water heater.
It is important to use the correct size anode rod for your RV’s water heater to ensure proper protection against corrosion and explosion. Using the wrong size anode rod can result in damage to the water heater’s metal lining and potentially dangerous situations.
Maintaining Your RV Water Heater
Maintaining your RV water heater is essential to ensure that it functions properly and lasts for a long time. Regular maintenance can help prevent costly repairs or replacements. Here are some tips to help you maintain your RV water heater:
Flushing Your RV Water Heater
Flushing your RV water heater is an important part of maintenance. Over time, mineral deposits can build up inside the tank, which can reduce its efficiency and even cause it to fail. Flushing the tank can help remove these deposits and keep your water heater functioning properly.
To flush your RV water heater, follow these steps:
- Turn off the water heater and allow it to cool down.
- Close the water supply valve to the water heater.
- Open a hot water faucet in your RV to relieve pressure in the water lines.
- Connect a hose to the drain valve on the water heater and place the other end in a bucket or drain.
- Open the drain valve and allow the water to drain out of the tank.
- Once the tank is empty, close the drain valve and open the cold water supply valve to the water heater.
- Open a hot water faucet in your RV to allow air to escape from the water lines.
- Turn on the water heater and wait for it to heat up.
Winterizing Your RV Water Heater
If you plan to store your RV in a location where temperatures drop below freezing, it is important to winterize your water heater to prevent damage. Here are the steps to winterize your RV water heater:
- Turn off the water heater and allow it to cool down.
- Close the water supply valve to the water heater.
- Open a hot water faucet in your RV to relieve pressure in the water lines.
- Connect a hose to the drain valve on the water heater and place the other end in a bucket or drain.
- Open the drain valve and allow the water to drain out of the tank.
- Once the tank is empty, close the drain valve and open the pressure relief valve to allow air to enter the tank.
- Remove the anode rod and replace it with a drain plug.
- Pour RV antifreeze into the water lines and faucets to prevent them from freezing.
- Turn on the water pump and run the faucets until the antifreeze comes out.
- Turn off the water pump and close all the faucets.
See Related: How To Winterize An RV
Troubleshooting Common Issues
When it comes to maintaining an RV’s water heater, it’s important to be aware of common issues that can arise. Here are some troubleshooting tips for common problems:
Leaks
One of the most common issues with RV water heaters is leaks. Leaks can occur due to a variety of reasons, such as a faulty pressure relief valve, a damaged drain valve, or a corroded tank. If you notice a leak, it’s important to address it as soon as possible to avoid further damage.
To troubleshoot a leak, start by checking the pressure relief valve. If it’s damaged or faulty, it may need to be replaced. If the valve is functioning properly, check the drain valve and the tank for any signs of damage or corrosion. If the tank is corroded, it may need to be replaced.
Rust
Rust is another common issue with RV water heaters. Rust can occur due to a variety of reasons, such as exposure to moisture or high temperatures. If you notice rust on your water heater, it’s important to address it as soon as possible to avoid further damage.
To troubleshoot rust, start by checking the anode rod. The anode rod is designed to attract corrosive elements away from the tank, so if it’s corroded, it may need to be replaced. If the anode rod is in good condition, check the tank for any signs of damage or corrosion. If the tank is corroded, it may need to be replaced.
Rotten Egg Smell
A rotten egg smell in your RV is a sign of hydrogen sulfide gas, which can occur when magnesium anode rods decay. If you notice a persistent odor, it’s important to address it as soon as possible to avoid further damage.
To troubleshoot a rotten egg smell, start by checking the anode rod. If it’s corroded, it may need to be replaced. It’s also important to flush the tank regularly to remove any buildup of sediment or bacteria.
Repairs
If you encounter any issues with your RV water heater, it’s important to address them as soon as possible to avoid further damage. While some repairs can be done yourself, others may require the assistance of a professional.
When making repairs, it’s important to follow the manufacturer’s instructions and use the appropriate tools and materials. If you’re unsure about how to make a repair, it’s best to consult a professional.
By being aware of these common issues and troubleshooting tips, you can help ensure that your RV’s water heater stays in top condition.
Additional Tips for Longevity
To ensure that your RV water heater anode rod lasts as long as possible, there are a few additional tips that you can follow.
Consider using a water softener in your RV. Hard water can cause minerals to build up in your water heater, which can lead to corrosion and other issues. Using a water softener can help to prevent this and extend the life of your anode rod.
Secondly, make sure to flush your water heater regularly. This will help to remove any sediment or buildup that may have accumulated over time. You can use a water heater rinser tool to make this process easier.
Thirdly, consider replacing your anode rod more frequently than recommended if you notice persistent odors or other signs of decay. This can help to prevent any further damage to your water heater.
Finally, if you are serious about extending the life of your RV water heater, consider investing in a high-quality RV water softener. These systems are designed to remove minerals and other impurities from your water, which can help to prevent corrosion and other issues.
You can ensure that your RV water heater anode rod lasts for as long as possible by following these tips, saving you time and money in the long run.
See our other helpful RV repair and troubleshooting guides while you’re here:
Can I Leave My RV Hot Water Heater On All The Time?
How To Switch Your RV Hot Water Heater From Propane To Electric