

Turning off the water to your RV toilet is a necessary step that you may need to take at some point whether you are replacing a valve, fixing a leak, or performing maintenance.
In this article, we will explain two ways how to turn off water to your RV toilet.
The first method is to turn off the RV water pump. This will cut off the water supply to your entire RV, including the toilet. The second method is to use the toilet shutoff valve if you have one installed. If you don’t have a shutoff valve, you can install one. We’ll explain each method in more detail, so you can choose the best option for your situation.
How To Turn Off RV Toilet Water
If you’re experiencing water woes with your RV toilet or need to make repairs, you’ll need to know how to turn off the water supply. Fortunately, there are a few ways to do this, depending on your RV’s plumbing setup.
Shut Off Your RV Toilet Water Supply Only
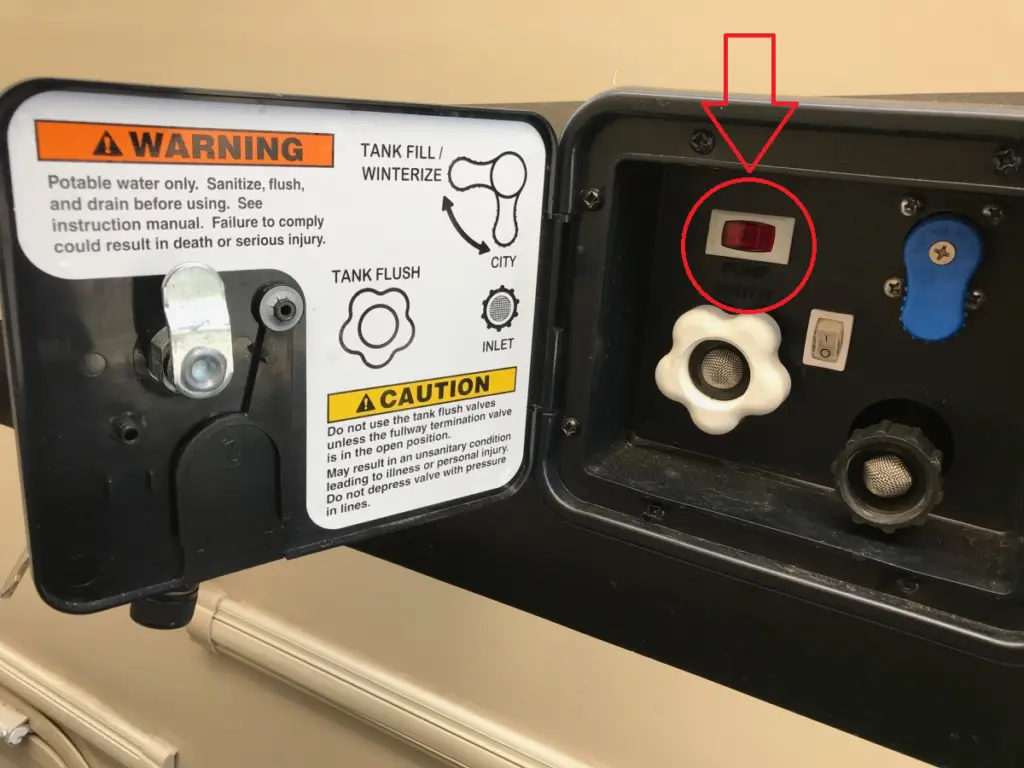
One way to turn off the water supply to your RV toilet is to shut off the external fresh water supply or the water pump switch.
Note that this option will cut off the water supply to your entire RV, which may not be ideal if you still need water for other purposes.
Install a RV Toilet Water Shut Off Valve
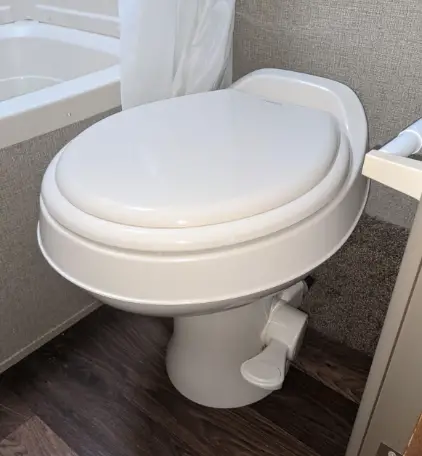
To cut off the water supply solely to your RV toilet, you can use the shut-off valve. This valve is typically located near the base of the toilet and can be turned off by twisting the valve handle clockwise. This is a convenient option that allows for quick and easy access to turn off the water supply solely to the toilet without affecting the rest of the RV’s water supply.
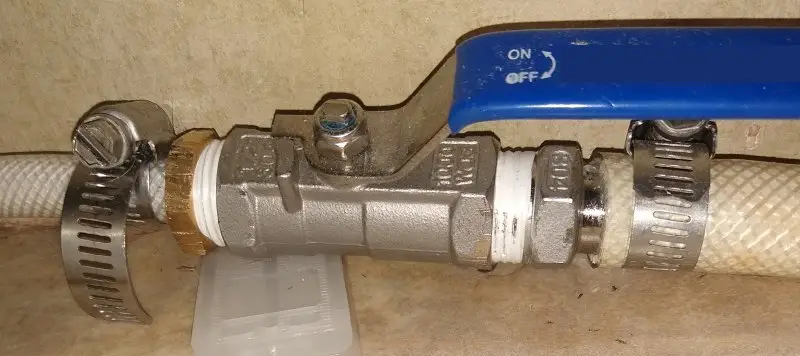
If you don’t have a shut-off valve installed, you can modify your plumbing to temporarily cut the water to your toilet but not your RV. To do this, you’ll need to locate the water supply line that feeds your RV toilet. Once you’ve located it, you can install a shut-off valve in the line.
To install the shut-off valve, you’ll need to turn off the external fresh water supply or the water pump switch. Then, you’ll need to drain the water from the line and cut the line where you want to install the valve. Install the valve and connect the line back together.
Once the valve is installed, you can turn the external fresh water supply or water pump switch back on and test the valve to ensure it’s working properly.
Identifying the Problem
If you notice any issues with your RV toilet, such as leaks, overflowing, or sewage smells, it’s important to identify the problem as soon as possible. Ignoring the issue can lead to further damage and costly repairs down the line. Here are some common problems that you may encounter:
Leaks
Leaks are a common problem with RV toilets and can be caused by a variety of factors. Check the toilet bowl, base, and surrounding area for any signs of water. If you notice a leak, try to identify where it’s coming from. It could be from a broken or worn out seal, a crack in the toilet bowl, or a loose connection in the plumbing.
Water Pressure
If you notice that the water pressure in your RV toilet is low, it could be due to a clog or blockage in the plumbing. Check the toilet trap and water lines for any debris or buildup that could be causing the issue.
Malfunctioning Toilet
If your toilet is not flushing properly or not filling up with water, it could be due to a malfunctioning component. Check the toilet’s flushing mechanism, water valve, and water supply lines for any issues.
Troubleshooting
If you’re having trouble identifying the problem with your RV toilet, try troubleshooting the issue. Check the owner’s manual for your RV toilet for troubleshooting tips and solutions. You can also consult with a professional RV technician for assistance.
Remember, identifying the problem with your RV toilet is the first step in resolving the issue. Don’t ignore any signs of trouble and take action as soon as possible to prevent further damage.
When You’ll Need To Turn Off Your RV Toilet’s Water
If you’re an RV owner, you know how important it is to maintain your vehicle’s water system to avoid any unwanted surprises. Turning off the water to your RV toilet is something you’ll need to do in certain situations. Here are some scenarios where you may need to turn off your RV toilet’s water supply:
RV Toilet Keeps Running
If your RV toilet keeps running even after you’ve flushed it, you’ll need to turn off the water supply to your toilet. This can be done by turning off the toilet shutoff valve, which is usually located near the base of the toilet. If you don’t have a shutoff valve installed, you can turn off the RV water pump to cut off the water supply to your entire rig.
See Related: How Much Water Does An RV Toilet Use Per Flush?
Dealing with Leaks and Clogs
If you’re experiencing leaks or clogs in your RV toilet, you’ll need to turn off the water supply to avoid any further damage. You can turn off the toilet shutoff valve or the RV water pump to cut off the water supply to your toilet. Once you’ve fixed the issue, you can turn the water supply back on.
See Related: Fixes for RV Toilet Not Holding Water
Disconnecting and Reconnecting the Toilet
If you need to disconnect or reconnect your RV toilet for any reason, you’ll need to turn off the water supply first. This can be done by turning off the shutoff valve or the water pump. Make sure to follow the manufacturer’s instructions when disconnecting or reconnecting your toilet to avoid any damage.
See Related: Can You Install A Regular Toilet In an RV? And RV Toilet Weight Limits
Preventive Measures and Maintenance
To avoid any issues with your RV toilet and its water supply, it’s important to take some preventive measures and perform regular maintenance. Here are some tips to keep in mind:
- Check the toilet seal regularly to make sure it’s not damaged or worn out. A damaged seal can cause leaks, which can lead to water damage and unpleasant odors. Replace the seal if necessary.
- Use the toilet sprayer as needed to keep the RV toilet clean. This will help prevent buildup and clogs, which can cause water to back up into the toilet and potentially overflow.
- When winterizing your RV, make sure to properly drain and flush the toilet to prevent any leftover water from freezing and causing damage. Use RV antifreeze as directed to protect the toilet and plumbing system.
- Use RV-specific chemicals in your toilet to help break down waste and control odors. Avoid using household cleaners or chemicals, as they can damage the toilet and harm the environment. Also use only RV-safe toilet paper.
Performing these simple maintenance tasks can help prevent costly repairs and ensure your RV toilet functions properly.