RV roof repair is an essential task for any RV owner. One of the most common problems that RV owners face is rotted wood in the roof. This is a serious issue that can lead to additional leaks and water damage if not addressed promptly.
Rotted wood in the roof can be caused by a variety of factors, including water damage, age, and poor maintenance. It is important to identify and address the problem as soon as possible to prevent further damage. Repairing the roof of an RV can be a challenging task, but with the right tools and knowledge, it can be done effectively.
Assessing the Damage
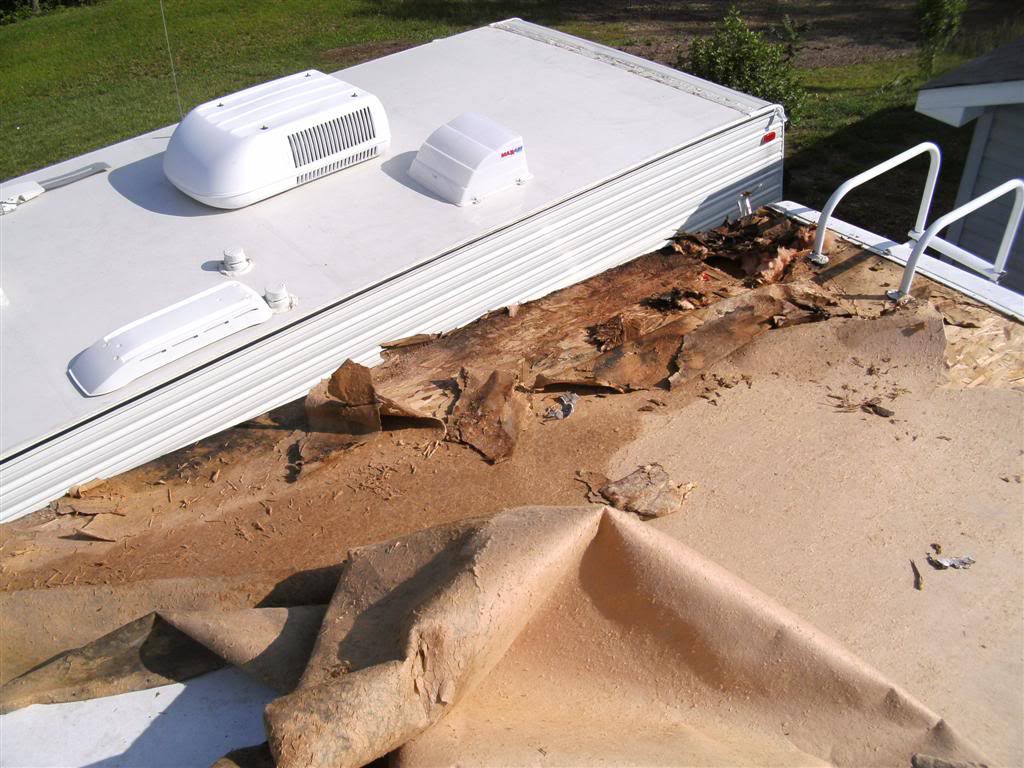
Before starting any repair work, it is essential to assess the extent of the damage to the RV roof. This will help determine the necessary repairs and materials needed to fix the problem.
Identifying Rotted Wood
One of the most common problems with RV roofs is rotted wood. Rotted wood occurs when water seeps into the roof and saturates the wood, causing it to weaken and eventually disintegrate. To identify rotted wood, look for areas that are soft to the touch or have a spongy texture.
Another way to identify rotted wood is to use a screwdriver or other sharp tool to probe the wood. If the wood is rotted, the tool will easily penetrate the surface, and the wood will crumble.
Checking for Leaks
Another common problem with RV roofs is leaks. Leaks can occur for several reasons, including damaged seals, cracks, or holes in the roof. To check for leaks, inspect the roof for any signs of water damage. Look for stains or discoloration on the ceiling or walls, as well as any musty odors.
One way to check for leaks is to use a hose to simulate rain and see if water enters the RV. Start at the lowest point on the roof and work your way up, paying close attention to areas around vents, skylights, and other protrusions.
It is essential to address any leaks promptly, as they can lead to more significant problems like rotted wood or mold growth.
Preparing for Repairs
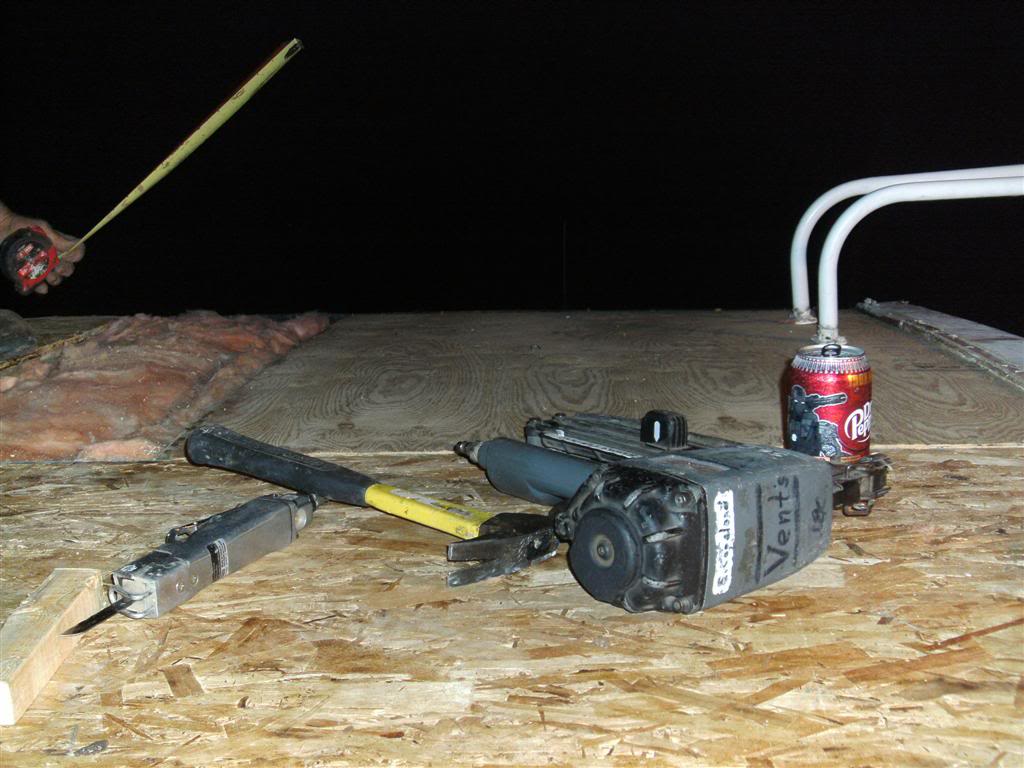
Before starting the repairs, it is important to gather all the necessary materials and tools. This will ensure that the repairs are done efficiently and effectively. Here are the steps to prepare for RV roof repair:
Gathering Materials
The first step is to gather all the materials needed for the repair. This includes:
- Roofing plywood
- Roofing screws
- Roofing sealant
- Roofing tape
- Roofing membrane
- Utility knife
- Drill
- Screwdriver
- Safety glasses
- Gloves
Removing the Damaged Wood
Once all the materials are gathered, the next step is to remove the damaged wood from the RV roof. This can be done by:
- Locating the damaged area and outlining it with a marker.
- Using a utility knife, cut along the outline to remove the roof membrane and the damaged wood.
- Remove any screws or nails that are holding the damaged wood in place.
- Inspect the area around the damaged wood for any signs of water damage or rot.
- If there is any water damage or rot, remove the damaged wood and replace it with new plywood.
By following these steps, you can prepare for the RV roof repair and ensure that the damaged wood is removed properly. This will make the repair process easier and more effective.
Repairing An RV Soft Spot
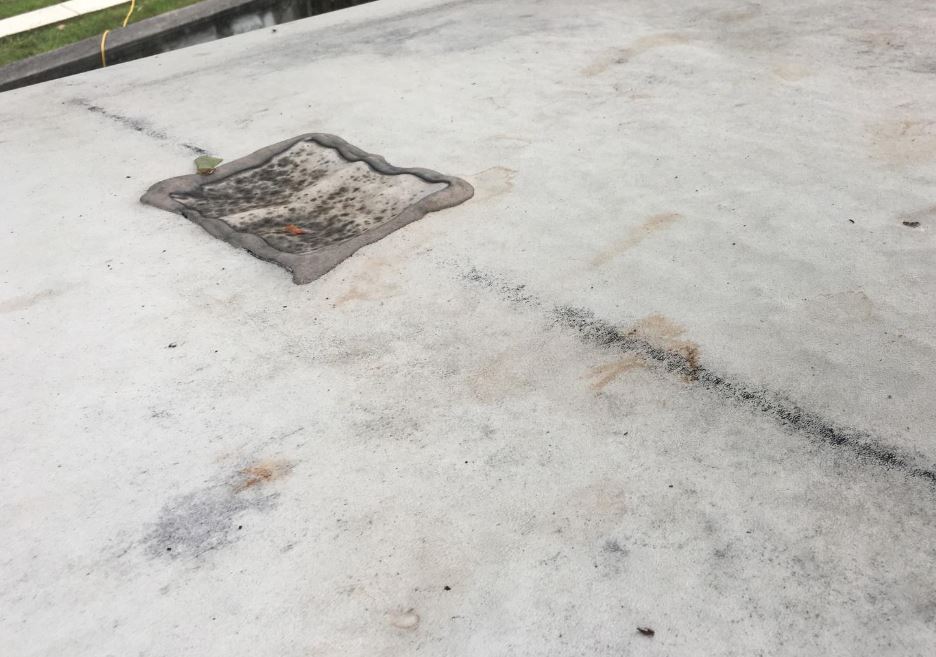
When it comes to repairing an RV soft spot, the process can be intimidating. However, with the right tools and knowledge, it is possible to fix the problem and prevent further damage. Here are the steps to repairing an RV soft spot:
Cutting and Fitting New Wood
Once the damaged wood is removed, measure and cut a new piece of wood to fit the hole. It is important to make sure that the new piece of wood fits snugly and is flush with the existing surface.
Add Supports For The New Piece
Before installing the new piece of wood, add supports underneath to ensure it is properly secured. Use wooden blocks or braces to hold the new piece of wood in place while you secure it.
Sealing and Waterproofing
After the new piece of wood is in place, it is important to seal and waterproof the area to prevent future damage. Apply a layer of sealant to the area and allow it to dry completely. Once the sealant is dry, apply a layer of waterproofing material to the area. Replace the membrane and seal that as well, or reapply an applicable RV roof coating.
Finishing Touches
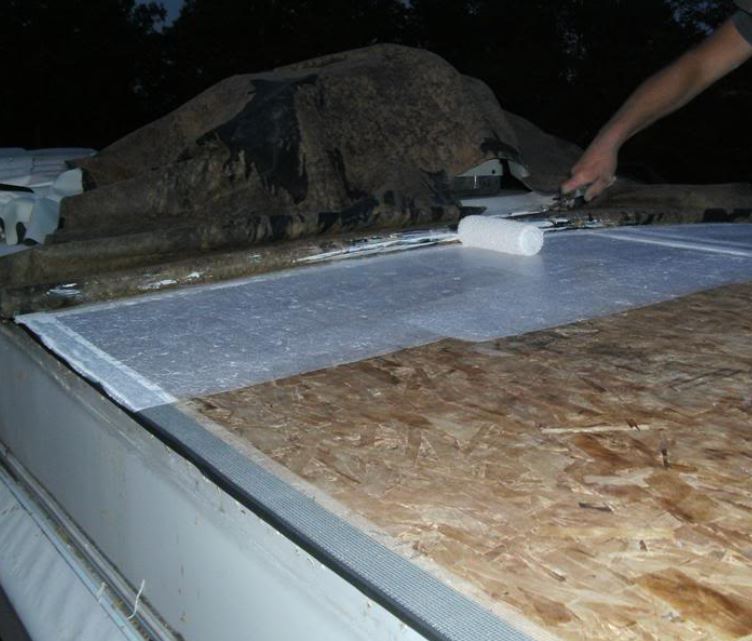
After replacing the rotten wood and fixing any leaks, it’s important to inspect the RV roof for any additional damage. This will ensure that the roof is in good condition and prevent any future issues.
Inspecting for Additional Damage
Inspect the roof for any cracks, holes, or other damage. Check the sealant around vents, skylights, and other roof fixtures to ensure it’s in good condition. If there are any issues, address them promptly to prevent further damage.
Additionally, check the inside of the RV for any signs of water damage, such as water stains or soft spots on the ceiling or walls. This will help ensure that any leaks have been fully addressed and prevent any further damage from occurring.
Painting or Coating the Repairs
Once all repairs have been made and the roof is in good condition, consider painting or coating the repairs to protect them from the elements. There are several options available, including RV roof coatings and sealants.
RV roof coatings are designed to protect the roof from UV rays, water, and other elements. They are typically applied with a roller or sprayer and provide a durable, long-lasting finish. Some popular options include Kool Seal, Dicor, and Heng’s.
Another option is to use an RV roof sealant, such as EternaBond or Flex Seal. These products are designed to seal leaks and prevent further damage. They can be applied directly to the repaired area or used to coat the entire roof.
Regardless of which option you choose, be sure to follow the manufacturer’s instructions carefully and apply the product evenly to ensure proper protection.
How To Prevent RV Rotted Wood
Preventing RV rotted wood is essential to avoid costly repairs in the future. Here are a few basic tips to help prevent wood rot:
- Regularly inspect your RV roof and wood for “trouble” spots. The earlier you identify wood rot, the better a chance you have at tackling it.
- Keep your RV well-sealed and dry. Improper sealing can lead to water infiltration and wood rot.
- Use a dehumidifier in your RV to reduce moisture levels.
- Do not let water sit on your RV roof or wood for extended periods of time. Remove any standing water as soon as possible.
- Do not park your RV under trees or in areas with a lot of foliage. Leaves and other debris can scratch or cut your roof membrane, allowing moisture in and promoting wood rot.
By following these simple tips, you can help prevent RV rotted wood and keep your RV in good condition for years to come.
Check out our other helpful RV repair guides while you’re here:
RV Roof Reseal Cost Guide

