
Connecting a trail camera to a computer is a simple and straightforward process that allows you to view and transfer photos and videos from the camera to your computer. This is especially useful for wildlife photographers who want to review and edit their footage on a larger screen. There are several methods available to connect a trail camera to a computer, each with its own set of pros and cons.
You can connect a trail camera to your computer by using an SD Card reader, hooking up a USB cable, connecting through WiFi, or by syncing your photos online if you have a cellular trail cam. All of these methods will get your trail camera photos on to your computer.
Connecting A Trail Camera to Your Computer
Connecting a trail camera to a computer is essential if you want to view photos and videos captured by the camera. There are several ways to connect a trail camera to a computer, including using a USB cable, an SD card reader, or through WiFi. Here are some methods to connect a trail cam to your computer:
Using a USB Cable
One of the easiest ways to connect a trail camera to a computer is by using a USB cable. Most trail cameras come with a USB cable, which can be used to transfer photos and videos to a computer. To connect the trail camera to a computer, follow these steps:
- Make sure the trail camera is turned off.
- Plug one end of the USB cable into the trail camera’s USB port.
- Plug the other end of the USB cable into the computer’s USB port.
- Turn on the trail camera.
- The computer should automatically detect the trail camera and display it in the File Explorer.
Using an SD Card Reader
Another way to connect a trail camera to a computer is by using an SD card reader. This method requires removing the SD card from the trail camera and inserting it into an SD card reader, which is then connected to the computer. Here’s how to do it:
- Turn off the trail camera and remove the SD card.
- Insert the SD card into the SD card reader.
- Connect the SD card reader to the computer’s USB port.
- The computer should automatically detect the SD card and display its contents in the File Explorer.
Connecting Via WiFi
Some trail cameras come with WiFi capabilities, which allow them to connect to a computer without the need for cables or card readers. To connect a trail camera to a computer via WiFi, follow these steps:
- Turn on the trail camera’s WiFi function.
- Connect the computer and the trail camera to the same WiFi network.
- Open the computer’s web browser and enter the trail camera’s IP address.
- The computer should display the trail camera’s interface, which can be used to view and download photos and videos.
Syncing Photos with a Cellular Trail Camera
If you have a cellular trail camera, you can sync photos and videos to your computer using a cloud-based service or a mobile app. Here’s how to do it:
- Install the cloud-based service or mobile app on your computer and cell phone.
- Connect the cellular trail camera to the cloud-based service or mobile app.
- The photos and videos captured by the cellular trail camera will be automatically synced to the cloud-based service or mobile app.
- You can then view and download the photos and videos from the cloud-based service or mobile app on your computer.
In conclusion, connecting a trail camera to a computer is relatively easy and straightforward. By following the steps outlined above, you can view and download photos and videos captured by your trail camera.
Storing and Managing Photos

Once you’ve downloaded your trail camera photos to your computer, it’s important to store and manage them properly to ensure you can access them easily in the future.
Using Cloud-Based Storage
One option for storing your trail camera photos is to use cloud-based storage. This allows you to store your photos online, which can be accessed from any device with an internet connection. Some popular cloud-based storage options include Google Drive, Dropbox, and iCloud.
To use cloud-based storage, simply create an account with the provider of your choice and upload your photos to the cloud. You can then access your photos from any device by logging into your account.
Saving to External Hard Drive
Another option for storing your trail camera photos is to save them to an external hard drive. This allows you to keep your photos stored offline, which can be more secure and reliable than cloud-based storage.
To save your photos to an external hard drive, simply connect the hard drive to your computer and create a new folder for your trail camera photos. You can then transfer your photos to the folder by dragging and dropping them from your computer’s file explorer.
It’s important to keep your external hard drive organized by creating separate folders for each trail camera and labeling them accordingly. This will make it easier to find specific photos in the future.
Managing Folder Contents
Whether you choose to use cloud-based storage or an external hard drive, it’s important to keep your folder contents organized. This can be achieved by using descriptive file names and organizing your photos into subfolders based on date, location, or subject.
Another important aspect of managing your folder contents is to regularly back up your photos to ensure they’re not lost in the event of a computer crash or other issue. This can be done by creating a backup folder and copying your photos to it on a regular basis.
By following these tips for storing and managing your trail camera photos, you can ensure that your photos are easily accessible and organized for years to come.
Troubleshooting Common Issues

Corrupt Files
One of the most common issues when connecting a trail camera to a computer is corrupt files. This can happen when the SD card is removed from the camera while it is still recording or when the card is full and the camera continues to take pictures. When this happens, the files on the SD card can become damaged or corrupted, making them unreadable by the computer.
To troubleshoot this issue, the user should try the following steps:
- Insert the SD card into a card reader and connect it to the computer.
- Use a file recovery software to attempt to recover the damaged files.
- If the files cannot be recovered, format the SD card and try again.
Connection Problems
Another common issue when connecting a trail camera to a computer is connection problems. This can happen when the USB cable is damaged or the camera is not properly connected to the computer.
To troubleshoot this issue, the user should try the following steps:
- Make sure the USB cable is properly connected to both the camera and the computer.
- Try using a different USB cable to see if the problem is with the cable.
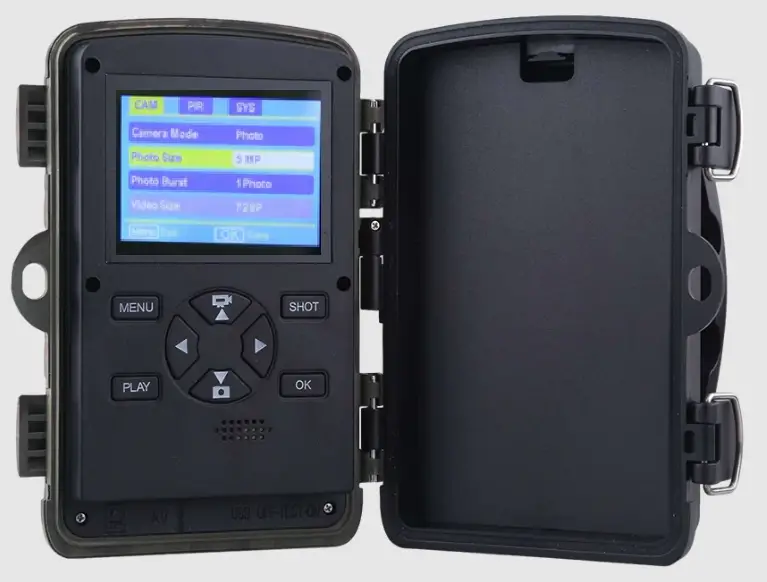
- Check the camera settings to make sure it is set to connect to a computer.
- Restart both the camera and the computer and try again.
By following these troubleshooting steps, users can easily resolve common issues when connecting a trail camera to a computer.
Frequently Asked Questions
To download pictures from your trail camera to your computer, you will need to connect the camera to your computer using a USB cable, SD card, a WiFi network, or sync to your cellular taril cam. Once connected, your trail camera’s photos should automatically display in File Explorer. You can then select the photos you want to download and drag them to a folder on your computer.
To view trail camera photos on an Android phone, you will need to transfer the photos from the camera to your phone. You can do this by connecting the camera to your phone using a USB cable or by removing the SD card from the camera and inserting it into your phone. Once the photos are on your phone, you can view them using the default photo viewer app or a third-party app.
To view video on a trail camera, you will need to connect the camera to your computer using a USB cable and transfer the video files to your computer. Once the files are on your computer, you can use a video player to view them.
Check out our other helpful trail cam guides while you’re here:
How To Change The PIR Delay On A Game Camera