
When it comes to using a trail camera, having an SD card with enough storage capacity is essential. It’s also important to know how to format the SD card correctly to avoid any issues that may arise during use. Formatting an SD card for a trail camera is a simple process that can be done in a few different ways.
There are four main ways to format your SD card for trail camera use: using Windows 10, using Disk Utility on Mac, using the trail camera menu, or using CMD on Windows. Using your trail cam menu is the easiest, but always backup your memory on the SD card first before formatting.
We’ll walk you through each method and some additional key info you’ll need to know in this guide.
Do SD Cards Need To Be Formatted For Trail Cameras?
When using a trail camera, it is important to ensure that the SD card being used is properly formatted. Formatting an SD card is the process of preparing it for use by erasing any existing data and creating a file system that the camera can read and write to.
While it may be tempting to simply insert a new SD card into the trail camera and start taking pictures, formatting the card first is highly recommended. It helps to ensure that the card is compatible with the camera and that it is functioning properly.
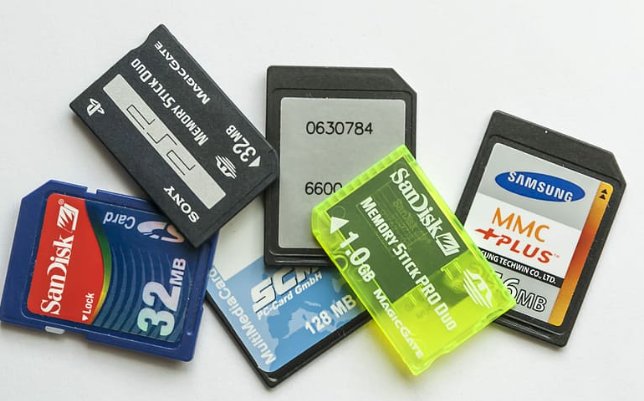
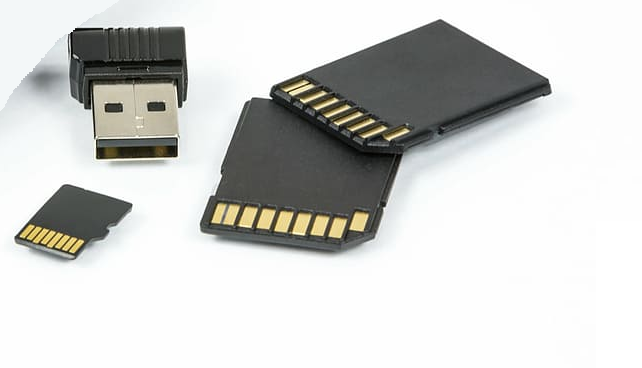
SD cards come in various sizes and types, including standard, mini, micro, and SDHC. It is important to check the user manual for the trail camera being used to determine which type of SD card is recommended.
In addition to the type of card, the speed of the card can also impact the performance of the trail camera. Faster cards allow for quicker transfer of data, which can be important when capturing high-resolution images or videos.
Overall, while it may not be strictly necessary to format an SD card for use with a trail camera, doing so can help ensure that the card is functioning properly and that the camera is able to read and write to it correctly. It is a simple process that can be done directly from the camera or using a computer.
Choosing the Right SD Card for Your Trail Camera
When it comes to trail cameras, choosing the right SD card is crucial to ensure optimal performance. Here are some factors to consider when selecting an SD card for your trail camera.
Compatibility with Camera Brand
The first thing to consider is the compatibility of the SD card with your trail camera. Most trail cameras are compatible with SDHC memory cards, which have a capacity between 4GB and 32GB. Some older trail cameras may only be compatible with standard SD cards. Most trail cams made after 2008 should be SDHC compatible. Be careful though- SDHC cards are not backward compatible, meaning they will not work on devices that only take standard SD cards.
Manufacturer Recommendations
It’s always a good idea to check the manufacturer’s recommendations for SD cards. For example, Moultrie recommends using Class 6 or higher SD cards for their A series and M series trail cameras. Spypoint recommends using Class 10 SD cards for their trail cameras. Bushnell recommends using SD cards with a minimum write speed of 6MB/s for their 1080p trail cameras. Following the manufacturer’s recommendations can help ensure that your trail camera performs optimally.
Storage Needs for Photos and Videos
The storage capacity of the SD card you choose will depend on your storage needs. If you plan on using your trail camera frequently and capturing a lot of photos and videos, you may want to consider a larger capacity SD card. However, keep in mind that larger capacity cards can be more expensive. If you plan on checking your trail camera frequently and downloading the photos and videos, you may not need as much storage capacity.
In summary, when choosing an SD card for your trail camera, it’s important to consider compatibility with your camera brand, the manufacturer’s recommendations, and your storage needs for photos and videos. By taking these factors into account, you can ensure that your trail camera performs optimally and you capture all the footage you need.
Formatting SD Cards
When using a trail camera, it is important to format the SD card before use to ensure optimal performance and to prevent data loss. There are several methods to format an SD card for trail camera use, including using a computer, the trail camera menu, Disk Utility on a Mac, and CMD and Diskpart on Windows.
Using a Computer
One way to format an SD card for a trail camera is to use a computer. To do this, insert the SD card into the computer’s card reader and open the File Explorer on Windows or Finder on Mac. Locate the SD card and right-click on it to select the Format option. Choose the file system type and allocation unit size, and then click Start to begin the formatting process.
Using the Trail Camera Menu
Another way to format an SD card is to use the trail camera menu. To do this, insert the SD card into the camera and turn it on. Navigate to the settings or options menu and look for the format option. Select this option and follow the prompts to format the SD card.
Using Disk Utility on a Mac
Mac users can also format an SD card for a trail camera using Disk Utility. To do this, insert the SD card into the Mac computer and open Disk Utility. Select the SD card from the list of devices and click on the Erase tab. Choose the file system type and name for the SD card, and then click Erase to format the SD card.
Using CMD and Diskpart on Windows
Windows users can also format an SD card using CMD and Diskpart. To do this, open CMD and type in “diskpart” to launch the Diskpart tool. Type in “list disk” to see a list of available disks, including the SD card. Select the SD card by typing in “select disk [number]” and then type in “clean” to clean the disk. Finally, type in “create partition primary” to create a new partition, and then type in “format fs=fat32 quick” to format the SD card.
Using Third-Party Tools for Formatting
Third-party tools are software programs that are not provided by the manufacturer of the trail camera or the SD card. These tools can be used to format SD cards for trail cameras, and they often offer additional features that are not available with the built-in formatting tools on the camera or computer.
One popular third-party tool for formatting SD cards is SD Formatter, which is developed by the SD Association. This tool is available for free download on their website and is compatible with Windows and Mac operating systems. SD Formatter offers a quick format option that can be used to erase all data on the card and prepare it for use in a trail camera.
Another third-party tool that can be used to format SD cards for trail cameras is EaseUS Partition Master. This tool is available for Windows and offers a variety of partition management features in addition to formatting. With EaseUS Partition Master, users can create, resize, move, and merge partitions on their SD card, as well as format it for use in a trail camera.
Some tools may not work with certain types of SD cards or may not be compatible with all trail cameras. It is also important to follow the instructions provided by the tool to ensure that the formatting is completed correctly.
Troubleshooting Common SD Card Issues
When using a trail camera, it’s important to ensure that the SD card is functioning properly. Here are some common issues that may arise with SD cards and how to troubleshoot them:
- Corrupted SD card: If the SD card becomes corrupted, it may not be able to be read by the trail camera. To fix this, try formatting the SD card on a computer and then reinserting it into the trail camera. If this doesn’t work, try using a different SD card.
- Poor connection: If the SD card is not making a good connection with the trail camera, it may not function properly. Make sure the SD card is inserted correctly and that there is no debris or dirt in the SD card slot. If this doesn’t work, try using a different SD card.
- Full SD card: If the SD card is full, the trail camera may not be able to save any new photos or videos. To fix this, either delete some of the files on the SD card or replace it with a larger capacity SD card.
- Incompatible SD card: Some trail cameras may only be compatible with certain types of SD cards. Check the trail camera’s manual to ensure that the SD card being used is compatible.
- Damaged SD card: If the SD card becomes physically damaged, it may not be able to be read by the trail camera. Try using a different SD card.
Specific Trail Camera SD Card Formatting Instructions
When formatting an SD card for a trail camera, it is important to follow specific instructions to ensure that the card is properly formatted and compatible with the camera. We’ve broken down the most popular trail cameras and how to access the SD card format option for each model.
Moultrie A Series
Here’s how to format an SD card for use in a Moultrie A Series trail camera:
- Set the camera to SETUP using the slider.
- Use the up and down arrows to select DEL Y on the menu (this means delete everything).
- Choose the OK selection. This will format your card.
Moultrie M Series
Follow the following steps to format an SD card for use in your Moultrie M Series trail cam:
- Use the mode selector tool to choose Personal Outset.
- Select the Menu option.
- Use the up and down arrows to select Optional Storage.
- Press the Enter key.
- Use the left and right arrows to select Delete Every Photograph.
- Press the Enter key.
- Use the buttons to change the option from NO to YES.
- Press the Enter key to finish formatting the card.
Moultrie P Series
Follow these steps to format your SD card for your Moultrie P Series trail camera:
- Use the mode selector slider to choose Custom Start.
- Choose the Menu button.
- Use the up and down buttons to choose Memory Options from the Menu screen.
- Choose the Enter button.
- Use the right and left buttons to choose Erase All Images.
- Press the Enter button.
- Use the up and down buttons to change the selection from NO to YES.
- Press the Enter button to finish formatting the SD card.
Moultrie S Series
Following these next steps will format your memory card for use in your Moultrie S Series:
- Use the mode selector slide to choose Custom Start.
- Choose the Menu button.
- Use the up and down arrow buttons until the display reads General Settings.
- Press the Enter button.
- Use the navigation buttons until the display reads Memory Settings.
- Press the Enter button.
- Use the navigation buttons until the display reads Erase All Images.
- Choose Yes.
- Press Enter to format your SD card for the Moultrie S Series trail cam.
Spypoint Trail Cameras
Follow these steps to format an SD card for a Spypoint Trail Camera:
- Use the up and down buttons to choose the Menu option.
- Select View and press OK.
- Press the OK button to see a thumbnail image in a larger view.
- Press OK to access the additional options menu.
- Use the up and down arrows to select the Format option.
- Press OK to format the SD card for use in your Spypoint camera.
Stealth G, ZX, and RX Series Trail Cams
- Use the slider switch to choose Custom Setting.
- Press the Menu button.
- Press the navigation arrow until the menu shows Format Card.
- Press the Enter button.
- The display will show the word “No” blinking, and press the up arrow once to change it to “Yes”.
- Press the Enter button to format the SD card for use in your Stealth G, ZX, or RX series camera.
Stealth P Series Trail Cams
- Use the slider switch to choose Custom Setting.
- Press the up and down navigation arrows until the menu shows Delete SD Card.
- Press the Enter button.
- The display will show the word “No” blinking, and press the up arrow once to change it to “Yes”.
- Press the Enter button to format the SD card for use in your Stealth P series camera.
Stealth Q Series Trail Cams
- Use the navigation buttons to choose Custom Setting.
- Press the Enter button.
- Press and hold the Enter button to get into the Advanced options.
- Use the up and down arrows until the menu shows Delete SD Card.
- Press the Enter button.
- The display will show the word “No” blinking, and press the up or down arrow to change it to “Yes”.
- Press the Enter button to format the SD card for use in your Stealth Q series camera.
Bushnell Trail Cameras
- Use the following instructions to format an SD card for use in Bushnell trail cameras:
- Select the Menu button.
- Use the up and down arrows to find the Format option.
- Press the OK button.
- Change the option from No to Yes using the up and down arrows.
- Press OK to format the SD card.
Cuddleback A & F Series Trail Cameras:
- Move the knob to the Menu position.
- Press the A button until the screen shows CLr (this means Clear SD Card).
- Press the B button to select this option.
- Press and hold the B button to Format the SD Card for use in your Cuddleback A or F Series trail cam.
- The display will flash red once the process has completed.
Cuddleback C & E Series Trail Cameras:
- Press the Mode button until the option that reads “Clear” is selected.
- Press the More button to select this option.
- Press the up and down navigation buttons to choose this selection.
- Press the same navigation button again to confirm and format the card.
Exodus Trail Cameras:
- Use the slider on the front of the camera to move it to Setup.
- Select the Menu button.
- Use the up and down arrows to choose Format.
- Press the Enter button.
- Highlight the Yes option.
- Press the Enter button to format the SD Card.
Browning Trail Cameras:
- Power the trail camera on.
- Press the Mode button.
- Use the navigation menu to find the Delete All option.
- Press the Enter button.
- Use the up and down navigation arrow buttons to choose Yes.
- Press the Enter button to format the SD card for use in your Browning trail cam.
Primos Trail Cameras (Proof Mode)
- Move the slider to the Setup option.
- Hold the up and down buttons together for 2 seconds to format the SD card.
Primos Trail Cameras (Mug Shot Mode)
- Move the slider to the AIM option.
- Use the up and down buttons until the display reads FOrN.
- Press the OK button.
- Use the arrows to change the display to FOrY.
- Press the OK button to format the SD card.
Check out our other helpful trail cam guides while you’re here:
How To Hide A Trail Cam From Humans