
A trail camera is a great tool for capturing wildlife photos and videos. You need to know how to program a trail camera properly to get the best results and take consistently clear photos. Many people find the process of programming a trail camera intimidating, but it doesn’t have to be. With a little bit of know-how, you can set up your trail camera to capture amazing shots in no time.
The main things to focus on when programming a trail camera include positioning the camera, the photo burst frequency, and choosing the right sensitivity settings for your location.
We’ll cover everything you need to know about setting up your trail cam in this guide.
Programming Your Trail Camera: 6 Key Settings
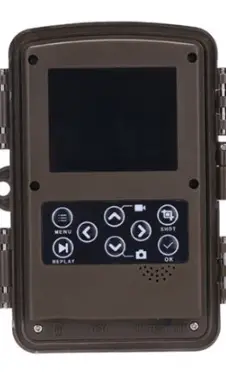
Understanding the Menu Settings
Before programming your trail camera, it is important to understand the menu settings. The menu settings can vary depending on the brand and model of your camera, but they generally include options such as camera mode, interval or delay, burst mode, sensitivity, and date and time.
Setting the Camera Mode or Capture Mode
The camera mode or capture mode determines how the trail camera will take photos or videos. Some common camera modes include video, single-photo, burst photos, and time-lapse. It is important to choose the camera mode that best suits your needs and the environment you are monitoring.
Setting the Interval or Delay
The interval or delay setting determines how often the trail camera will take a photo or video. This setting can range from seconds to minutes or even hours. It is important to choose the appropriate interval or delay based on the activity you are monitoring.
Setting the Burst Mode
The burst mode determines how many photos the trail camera will take in quick succession when it detects motion. This setting can range from one to several photos. It is important to choose the appropriate burst mode based on the activity you are monitoring.
Setting the Sensitivity
The sensitivity setting determines how sensitive the trail camera is to motion. This setting can range from low to high sensitivity. It is important to choose the appropriate sensitivity based on the activity you are monitoring and the environment in which the camera is placed.
Setting the Date and Time
Setting the date and time on your trail camera is important for accurately recording the activity you are monitoring. Most cameras have an automatic date and time setting, but it is important to double-check and adjust if necessary..
Setting Up Your Trail Camera
When setting up your trail camera, there are a few important factors to consider to ensure that you capture the best footage possible. Here are some essential steps to follow:
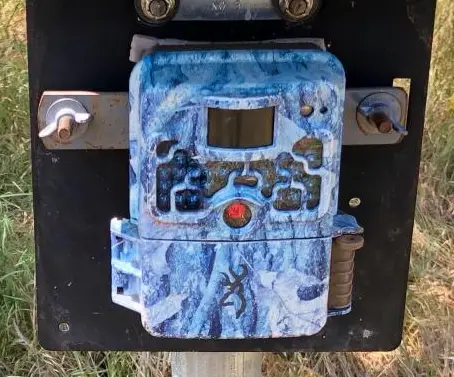
Choosing the Right Location
Choosing the right location is crucial when setting up your trail camera. You should choose an area where you know animals are likely to pass by, such as near a watering hole or along a game trail. It’s also important to consider the direction of the sun and the time of day when animals are most active.
If theft is a concern, hide your trail camera from other people to avoid it getting stolen.
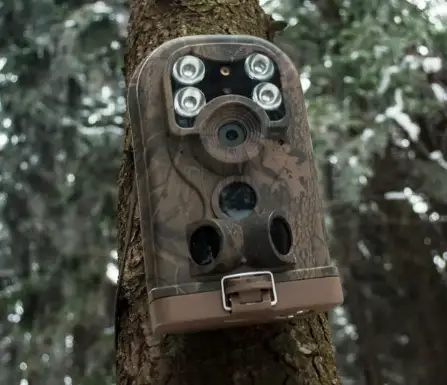
Mounting Your Trail Camera
Once you have chosen the right location for your trail camera, it’s time to mount it. Make sure that your camera is securely attached to a tree or other sturdy object and at the right height to capture the best footage. It’s recommended to mount your camera at least three feet off the ground and at a slight angle to reduce glare.
Choosing the Right SD Card
Choosing the right SD card is important to ensure that your camera can capture and store footage properly. Make sure to choose a high-quality SD card with sufficient storage capacity for your needs. It’s also important to format the SD card before using it in your trail camera to prevent any issues with recording or playback.
Choosing the Right Batteries
Choosing the right batteries is critical to ensure that your camera has enough power to capture footage over an extended period. Lithium batteries are recommended for trail cameras, as they last longer and perform better in extreme temperatures. Make sure to check the battery life of your camera regularly and replace the batteries as needed.
Testing Your Trail Camera
Once you have successfully programmed your trail camera, it is important to test it to ensure that it is working properly. This will help avoid any disappointment when you later check the footage and find out that the camera did not capture any photos or videos.
To test your trail camera, follow these simple steps:
- Set up the camera in the desired location and angle.
- Insert fresh batteries and ensure that the memory card is properly inserted.
- Turn on the camera and wait for it to start up.
- Walk in front of the camera to test the motion sensor. Ensure that the camera captures both photos and videos when you walk past it.
- Check the footage to ensure that the images and videos are clear and of good quality.
It is important to test your trail camera at different times of the day and in various weather conditions to ensure that it captures footage in different lighting situations. This will also help you determine the best location for your camera.
When testing your trail camera, it is important to remember that the quality of the footage will depend on various factors such as the camera’s resolution, sensor sensitivity, and lens quality. Therefore, it is important to choose a camera that meets your needs and budget.
If your trail camera isn’t taking photos, you’ll need to troubleshoot to see what the problem is and resolve it.
Tips for Capturing the Best Footage
When it comes to capturing the best footage with your trail camera, there are a few tips you can follow to ensure you get the shots you want. Here are some tips to help you capture the best footage possible.
Using Time-Lapse Mode
One way to capture great footage with your trail camera is to use time-lapse mode. This mode takes a photo at a set interval, allowing you to capture a series of photos over a long period of time. This is great for capturing the movement of animals over an extended period.
When using time-lapse mode, it’s important to consider the interval between photos. A shorter interval will result in more photos but may drain your battery faster. A longer interval may conserve battery life but may result in missed shots. It’s important to find the right balance for your needs.
Using Burst Photo Mode
Another way to capture great footage is to use burst photo mode. This mode takes a series of photos in quick succession, allowing you to capture fast-moving animals or multiple animals in one shot.
When using burst photo mode, it’s important to consider the number of photos taken in each burst. A higher number of photos may result in more shots to choose from but may take up more space on your SD card. A lower number of photos may conserve space but may result in missed shots.
Understanding the PIR Sensor
The PIR (passive infrared) sensor is a critical component of your trail camera. It detects changes in temperature and motion, triggering the camera to take a photo or start recording video.
Understanding how the PIR sensor works is important for capturing the best footage. It’s important to consider the placement of your camera and the sensitivity of the sensor. A camera placed too high or too low may miss shots, while a sensor set too high may trigger false readings.
By following these tips and understanding the features of your trail camera, you can capture the best footage possible. Whether you’re using time-lapse mode, burst photo mode, or relying on the PIR sensor, taking the time to set up your camera properly can make all the difference in the quality of your footage.